
The beginning of this story is that I was able to get a plethora (that’s a fun word, say it again) of glass tile samples from a friend. I spent months soaking them off the carrier cards and cleaning of the excess paper. When we last left off, it was the middle of winter, and I had arranged them on some graph paper.
I couldn’t leave them there indefinitely. I had moved my design board out to the back porch when it was too cold to spend any time out there, but the weather was warming up, and I was forced into action. This meant building the table top and sticking all those tiles down.
-

- glueing the edges on the top
-

- looks like a table already
I measured my layout as best I could, and hotfooted it off to the lumberyard (okay. It was Lowe’s.) to buy my base and edging. I learned from building the coffee table that I should have the edging be just a little lower than the tiles, and lattice was just right. I added the width of the lattice to my total dimension, cut the top, and glued it up before I nailed it from the back.
Before I did all that, I drew a big X on the top, so I would know where the middle was.
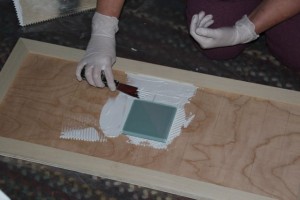
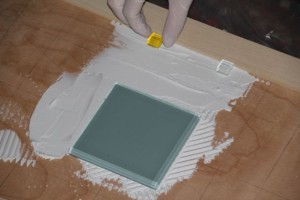
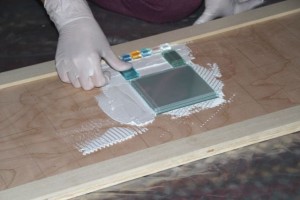
I also learned that I have to work fast and not put too much adhesive down on the table at once. This design is symmetrical where the coffee table was not, so that made this part go much faster. I love these vinyl gloves you can buy at the drugstore. I wear them for all sorts of crafts.


I think they look all glowy with the light shining through.
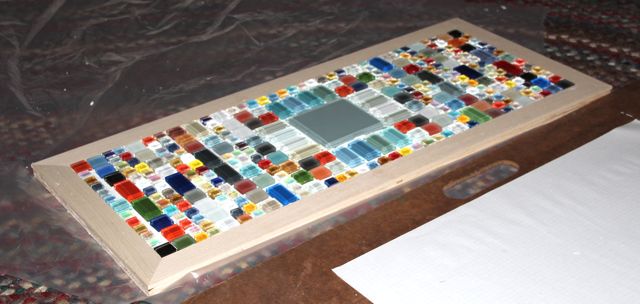
The adhesive is all set up now. In fact, it’s been a few months. Ready to design the rest of the table now. I’m going to build it before I paint it. And I’m going to grout it last of all. I still haven’t decided what color anything is going to be. Or what color grout. I do know that I have to get unsanded grout. I was told that the other kind would scratch the tiles.