I have had the same kind of cake every year on my birthday for as long as I can remember. That’s a lot of slices of lemon cake with chocolate icing. Whenever I mention the combination to anyone, they look skeptical. But as soon as they taste it, they love it. I am happy to think of myself as creating this flavor combination and introducing it to many others.
The best cakes are always made from scratch. There are lots of great recipes out there, but I recently made this one and think it’s my new favorite.
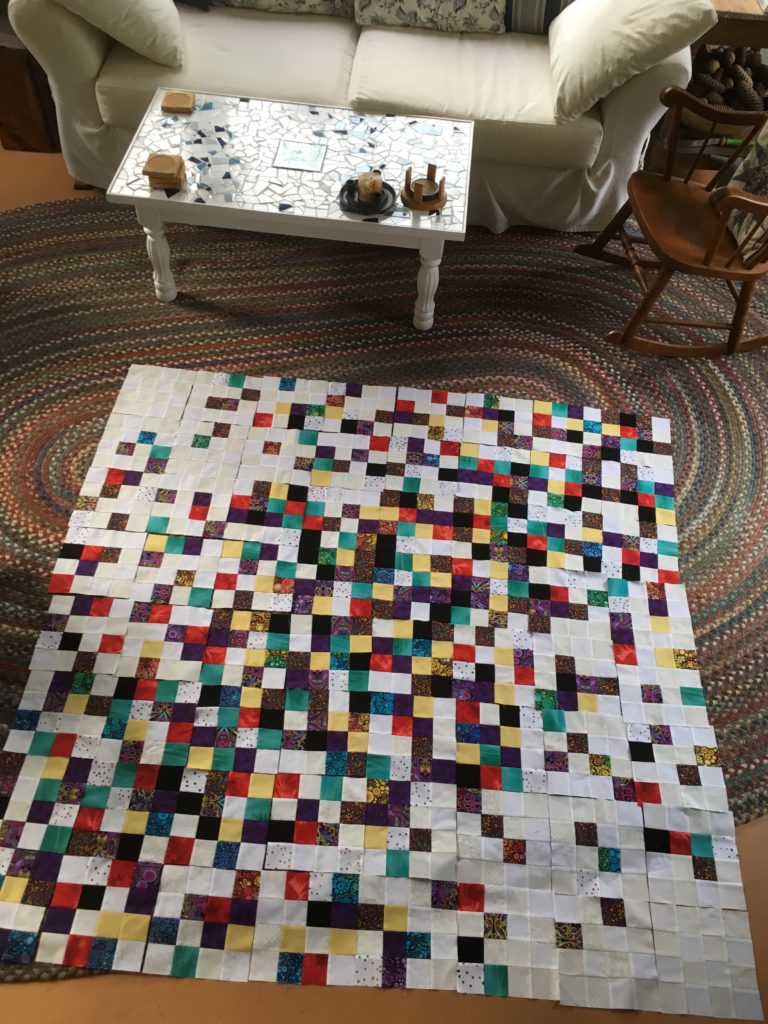
It all began with a roll of white and cream fabrics that come pre-cut at 2 1/2 inches wide in a package of 20 fabrics. And every now and then, I like to make something up and not do a standard traditional pattern. But how to showcase the whites?
I also had a set of brightly colored fabrics I wanted to use, but the best designs come from limiting my palette. So I chose 5 solid (or almost solid) colors, 3 patterns, and a white with a little pattern. One of the patterns had a gradation, so it really looked like many colors.
strips dark to light
I stitched a bunch of groups of 4 together ranging from some that were all white to some that had no white in them at all. The idea was to group them together in blocks of 16 squares that ranged from light to dark. And then to arrange them so there was a bit of gradation on the whole top.
I tried a few arrangements before settling on the final one. My goal was to make it look like there wasn’t really a pattern when secretly there was.
Layout on the floor-see the individual blocks
Center layout on the floor
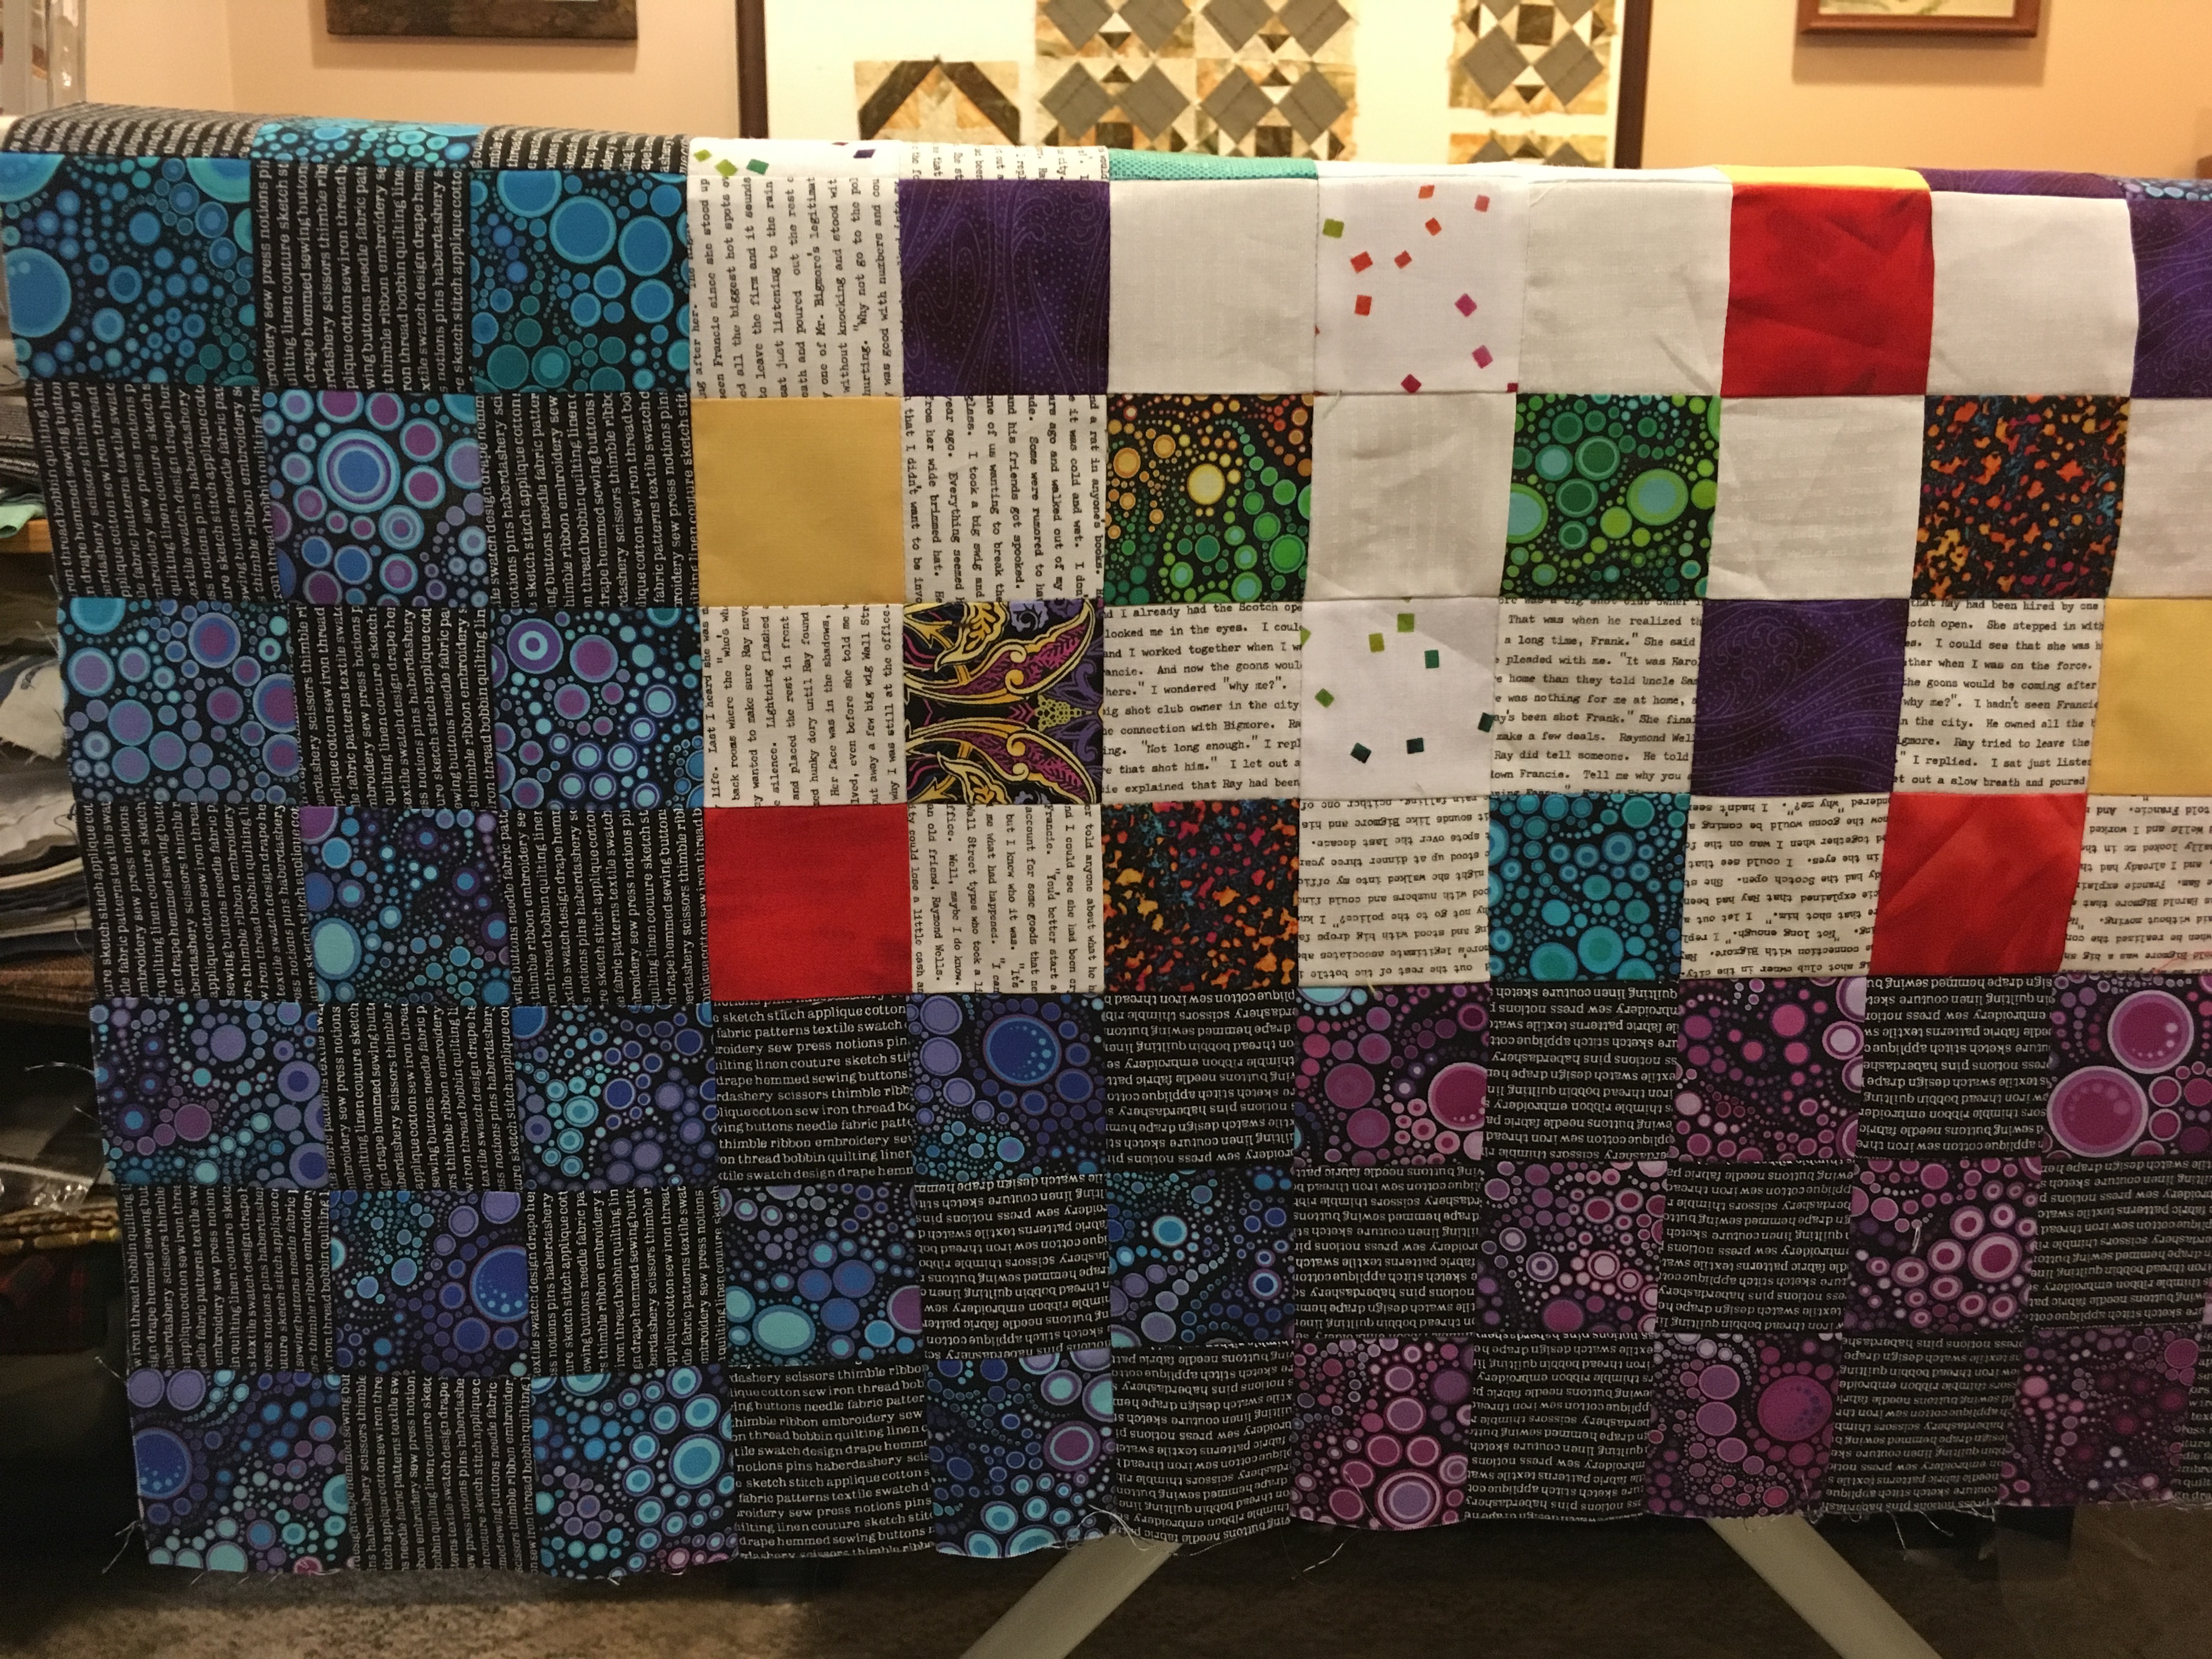
Assembled center
Close-up assembled center
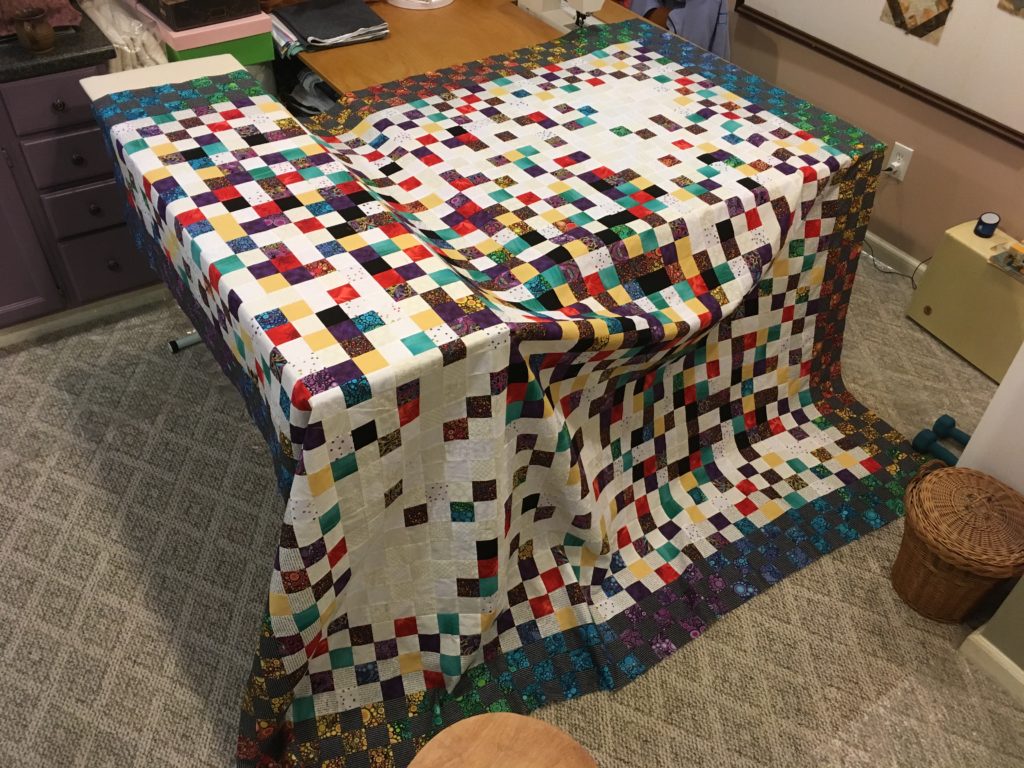
This sat on my wall through the Christmas holiday while life rushed on, and I thought about how to do a border. It may not look like it, but there are really 3 borders on this. The innermost border and the second border are the same checkerboard pattern of all the colors with a white-on-white print on the first and a black-on-white print in the second.
Borders
The outermost border is all from only 2 fabrics, the gradated fabric and a black with white text print. Much to my frustration, the same text print as the first 2 borders did not come in a black-on-white. So I’m not going to show you this fabric close up. The only trick with this border was to make sure that the gradation rounded all 4 corners without a visual jump.
Too big for my sewing table!
Hmmm. Guess I’d better take a picture of it on the floor.
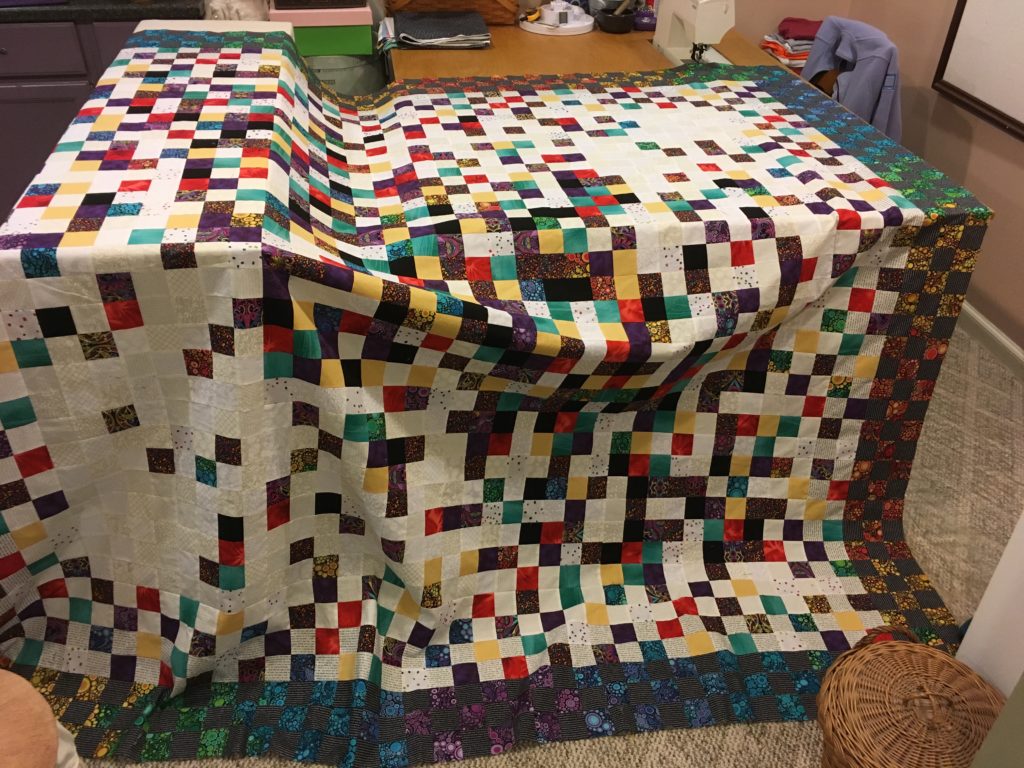
Can you read the border?
Ready to pin the layers
Back and front
I quilted it with a blue thread on the back and a clear nylon on the front. I’m a big fan of stitching in the ditch, which for you non-quilters is stitching in the seam between the rows. Unfortunately, because of the sheer size of this thing, I had to turn it in my machine and ended up pulling the center rows in opposite directions which resulted in a wonky center. Since viewing the pattern (or non-pattern) is dependent on perfectly straight lines, I had to fix that. So I spent a meditative week ripping out all the bad stitching and a few hours on the weekend restitching the quilting. ABSOLUTELY worth the effort.
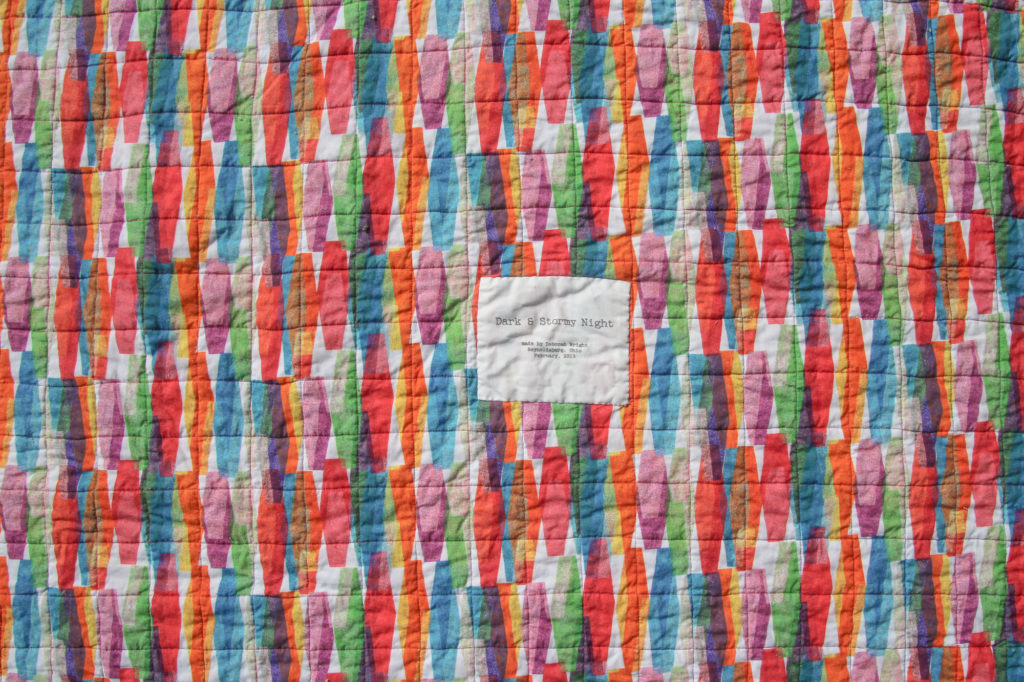
Dark & Stormy Night – 92×92
Back of Dark & Stormy Night
Queen Size
And why did I call it Dark & Stormy Night? Well it’s true that I love mysteries. But really it because of the story that is on the print text fabric. It never does actually say it was a dark and stormy night. but it is very noir in its own right. See for yourself.
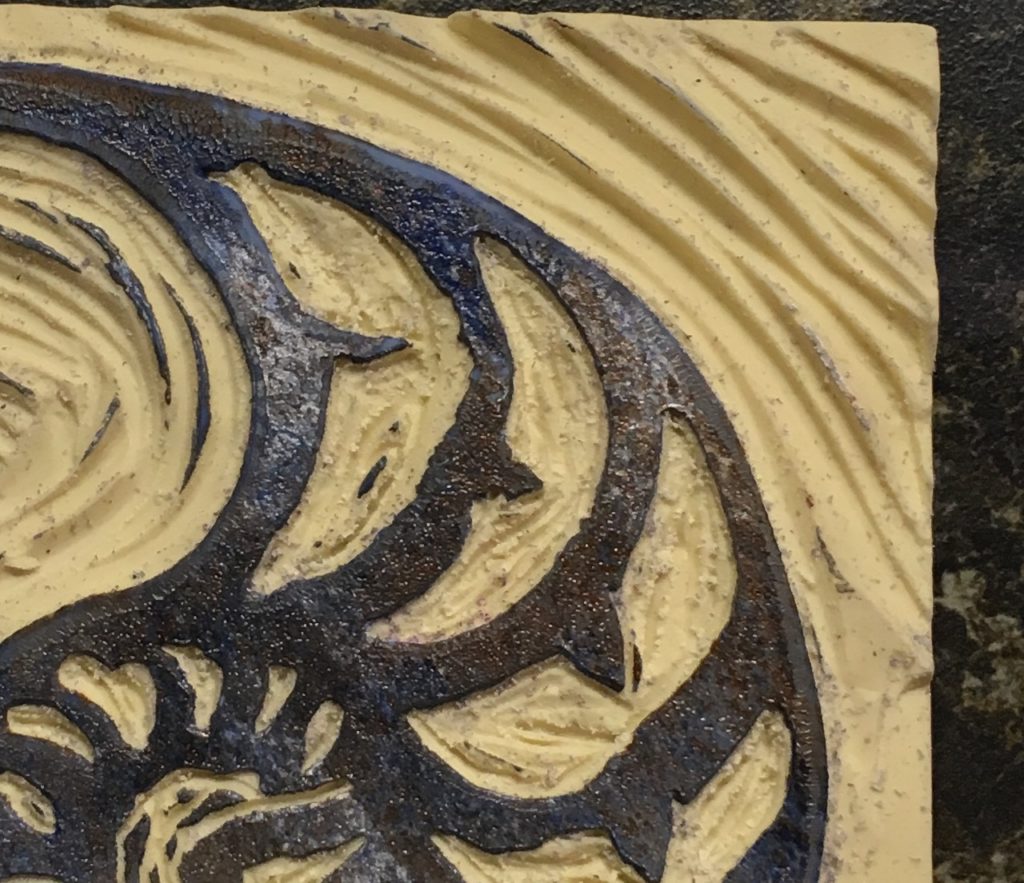
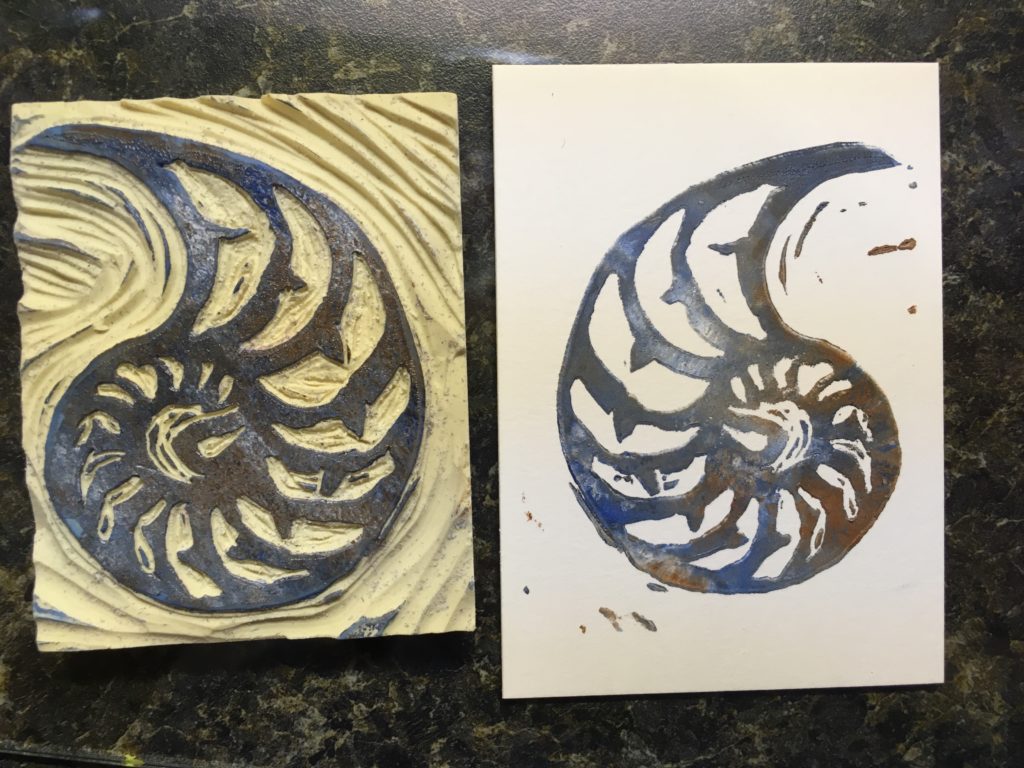
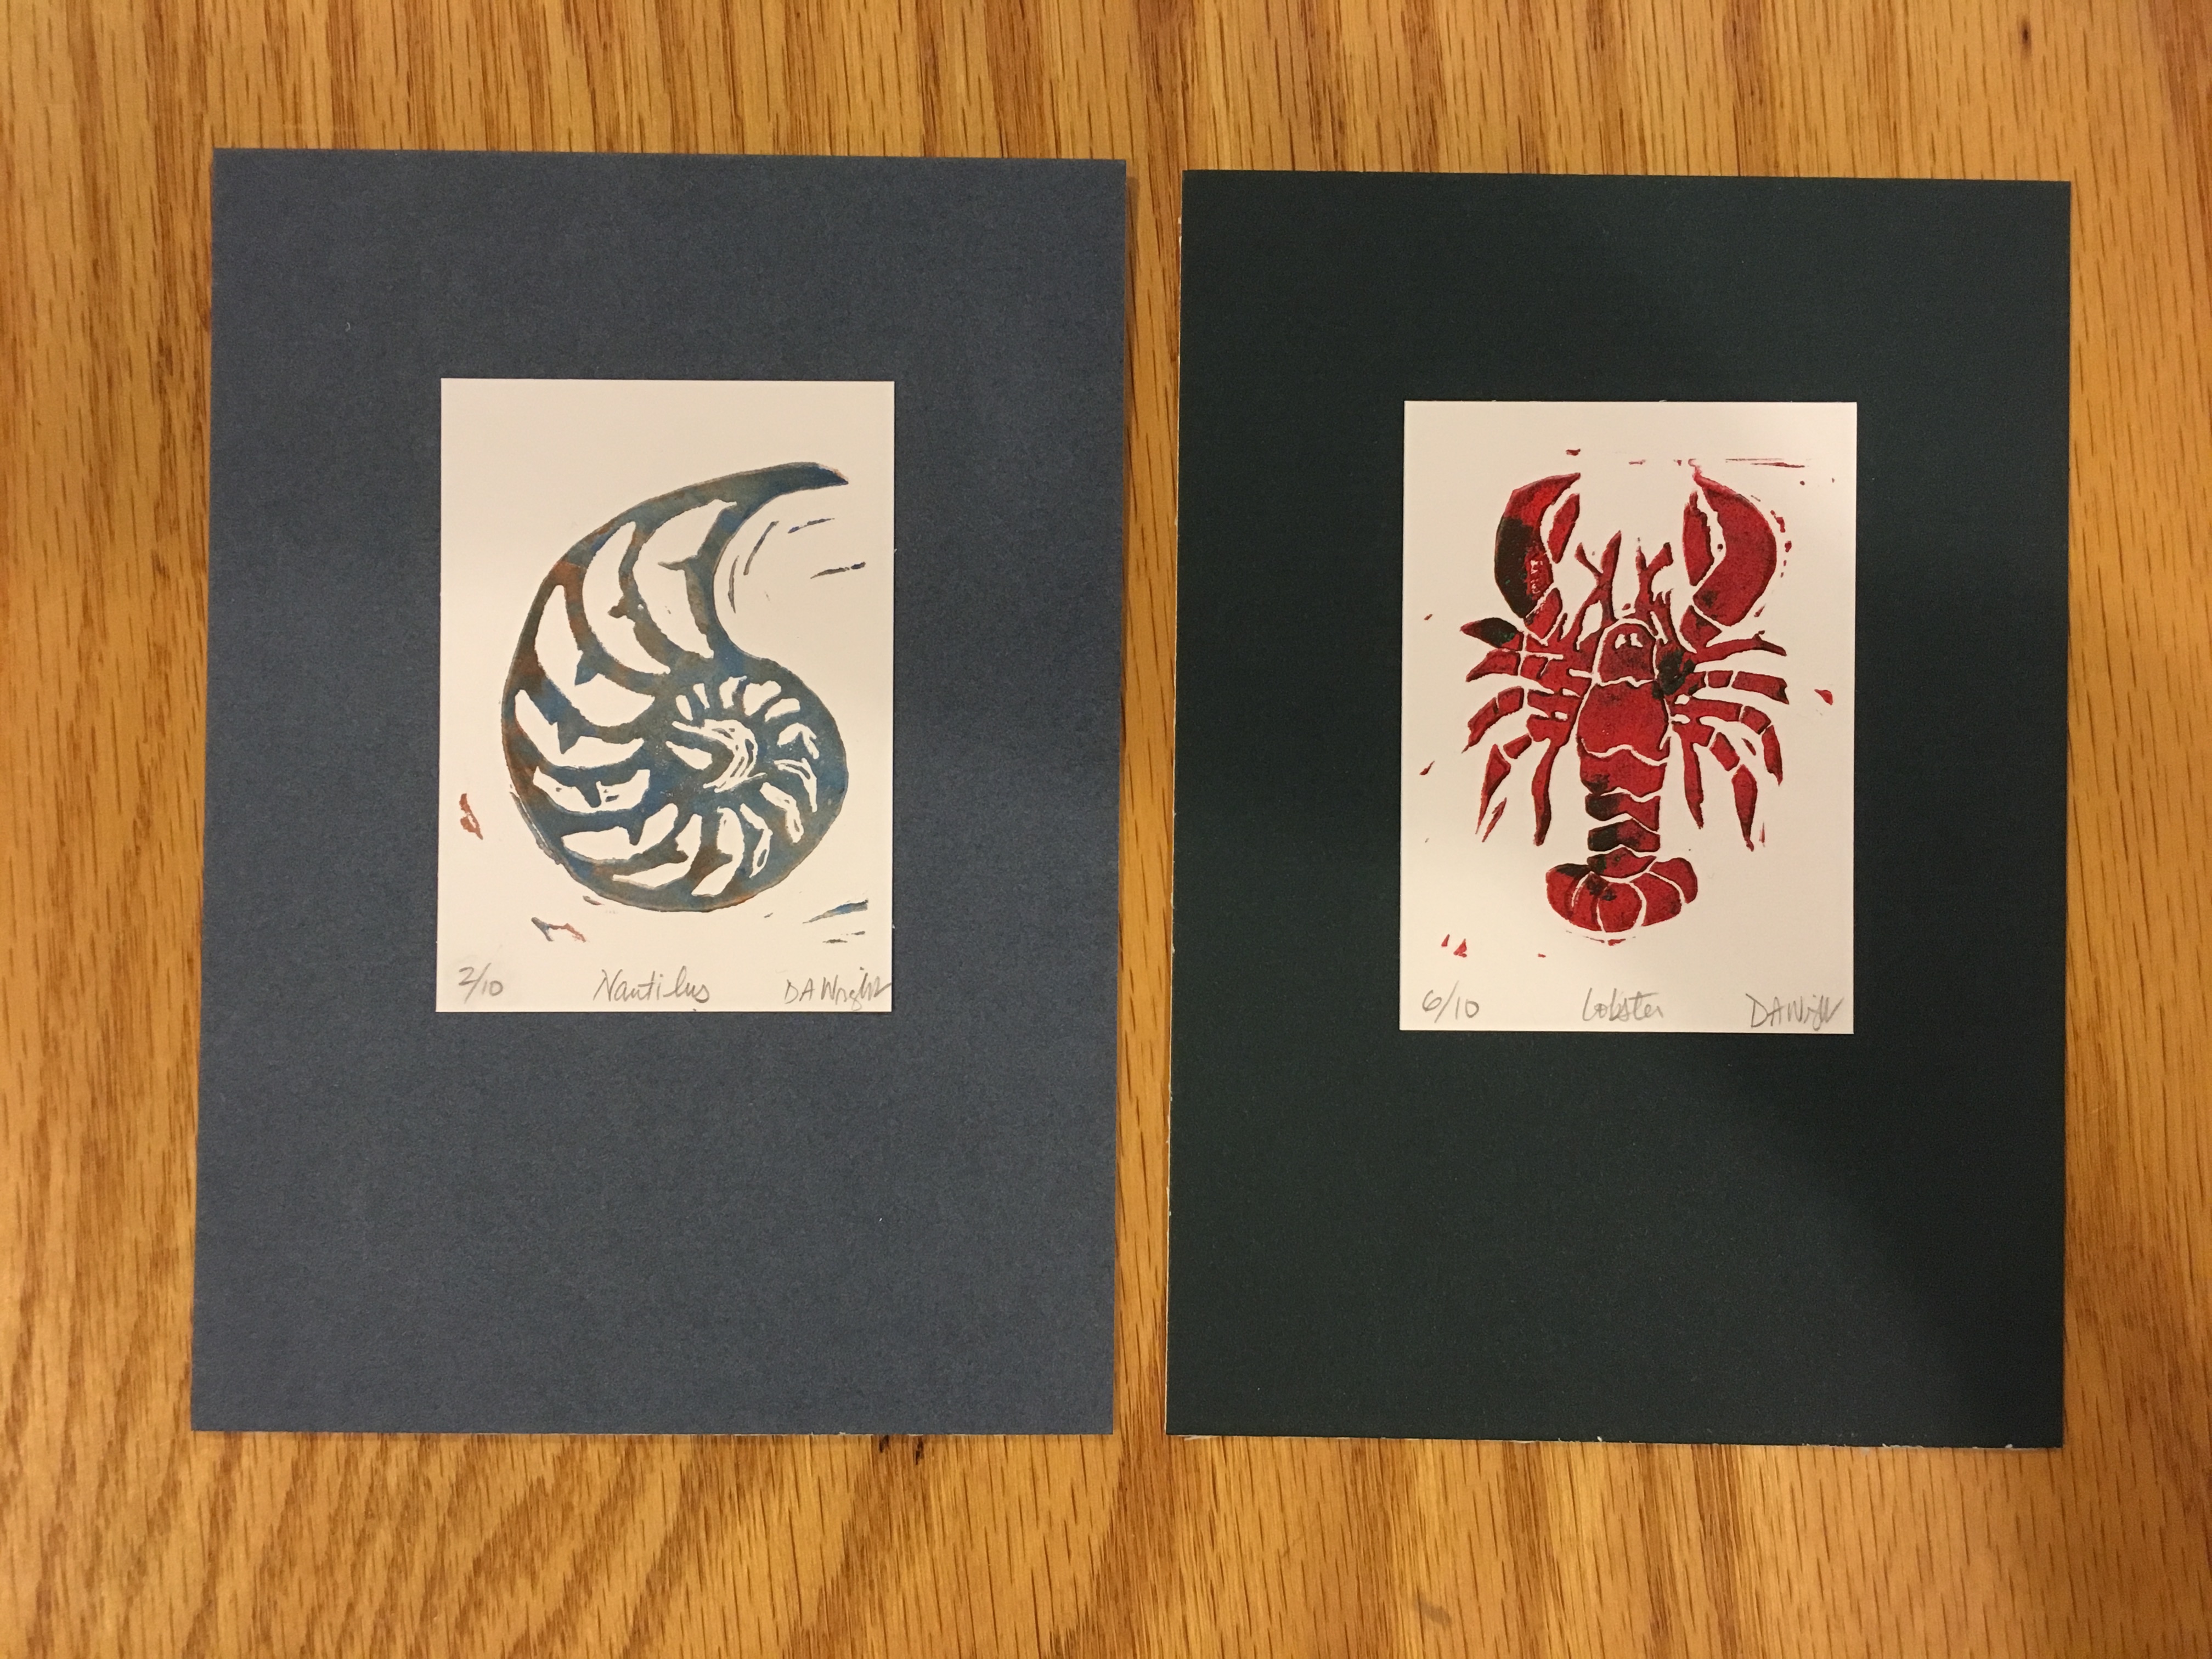
I’ve always loved the look of block printing. I made all our Christmas cards this past year, and it had me yearning to create a little set of beachy themed prints. It’s a very calming thing to design and cut a linoleum block. It’s not something that can be rushed since you’re working with sharp objects to cut the block.
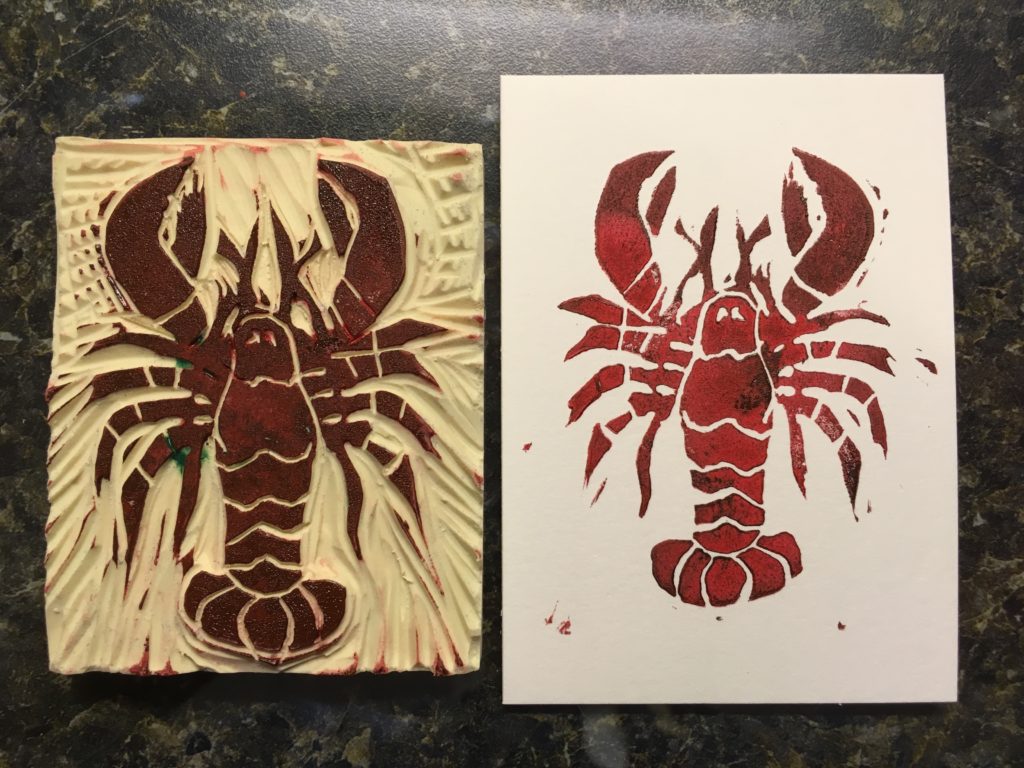
So I settled on my favorite shapes for my first 2 prints. The plan is to do a series of six.
One of my other favorite things about block printing is that they don’t have to be a solid color even if it is a single block design. So I chose a few blended colors for the nautilus.
My other favorite thing is lobsters. I like eating them. And I like looking at them.
Each is 2 1/2 x 3 1/2 and mounted on a 5×7″ board. I made 10 of each and am selling them for $15. Or maybe I’ll just keep one set for myself!
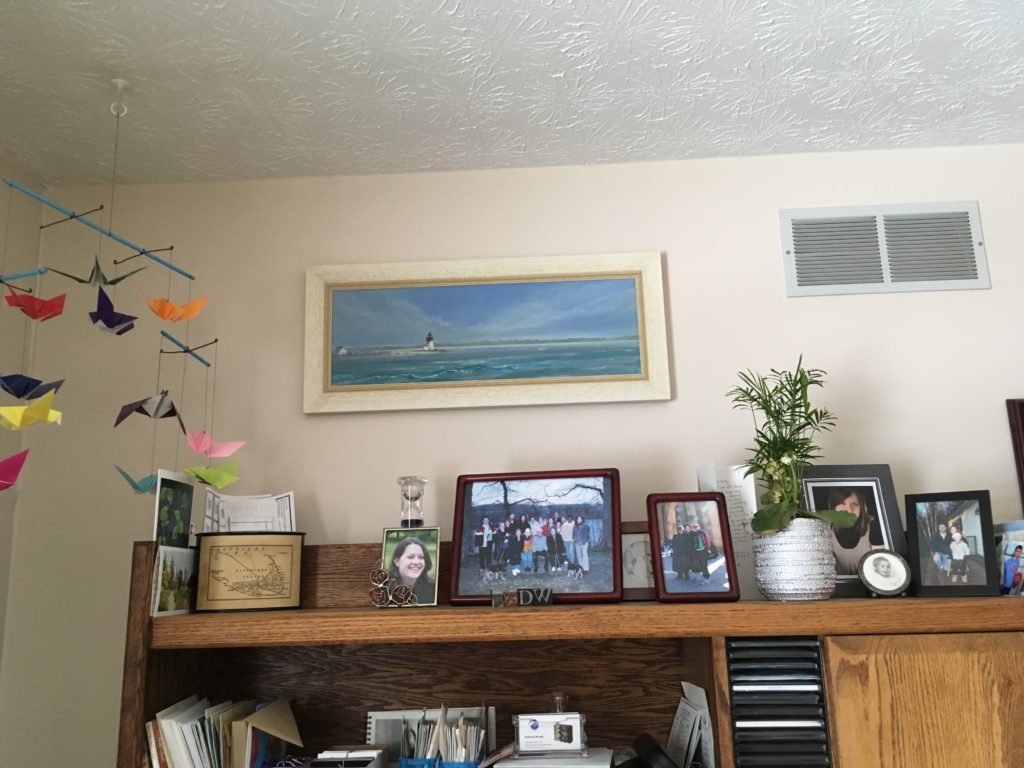
I’m working on a new quilt. But until I finish it, I thought I’d share some of the things that I really love around my house – besides my husband that is. Let’s start in my office…
From left to right: a handmade mobile, the Nantucket themed tin I keep mailing supplies in, a painting of Brant Point lighthouse, and family pictures.
My youngest step-daughter made this for my birthday one year. There is an origami bird for every year that we had been part of each others lives. I built the mobile from all the birds she made for me. But I always think of the whole thing as being from her.
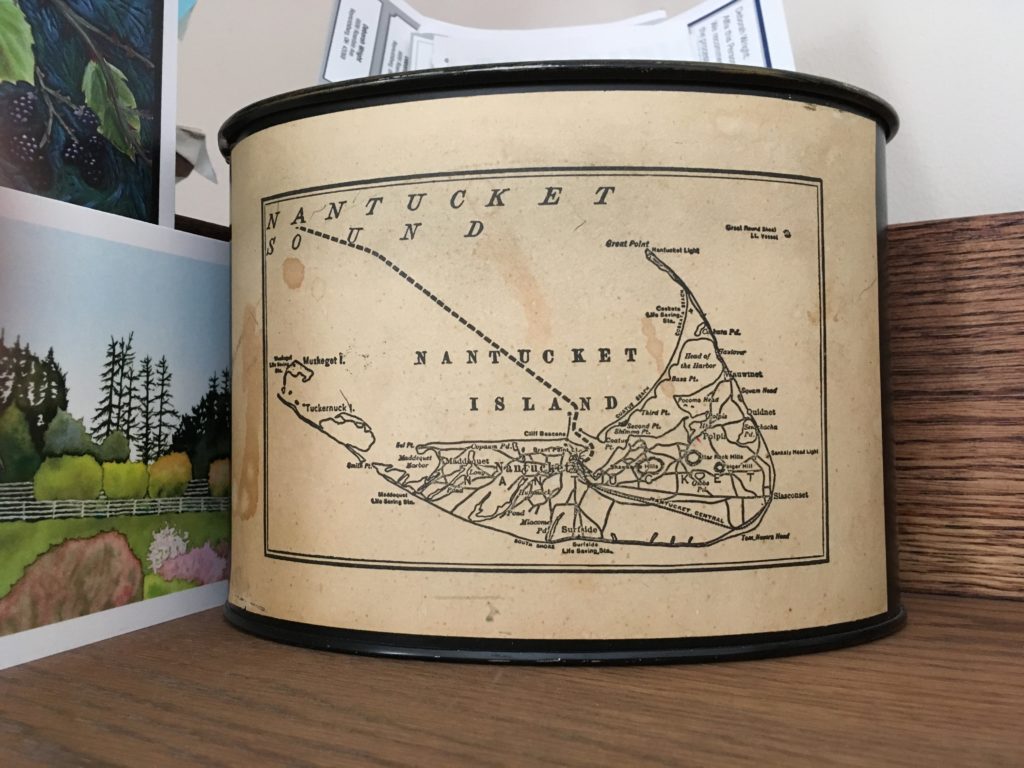
I married my previous husband in 1983, One of our invited guests was Fred Rogers, an old family friend. He was unable to come, but he sent this tin and a matching trash can from his summer home on Nantucket. I have special ties to the Island myself, so I treasure this for the place as well as the sender.
More Nantucket. My husband is many things including a wonderful painter. He painted this oil a few years ago, and this month I finally framed it. I really love the rustic white with a more formal gold roping. I sit at my desk every morning before I go to my day job and look at this.
Every member of my family is artistic. My step-daughter loves to draw and requested Copic markers for Christmas a few years ago. We got this as a thank you note.
One of my other favorite places is this cabinet in my kitchen. It has coffee, tea, cocoa, and baking spices. Everything good lives in this cabinet. And the smell that comes out when I open the door never fails to warm me. If I could live inside it, I probably would.
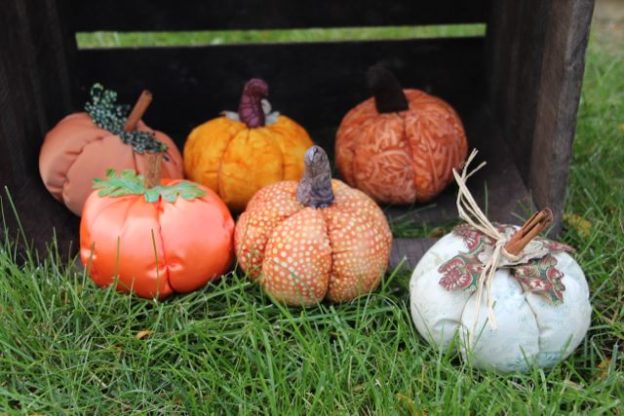
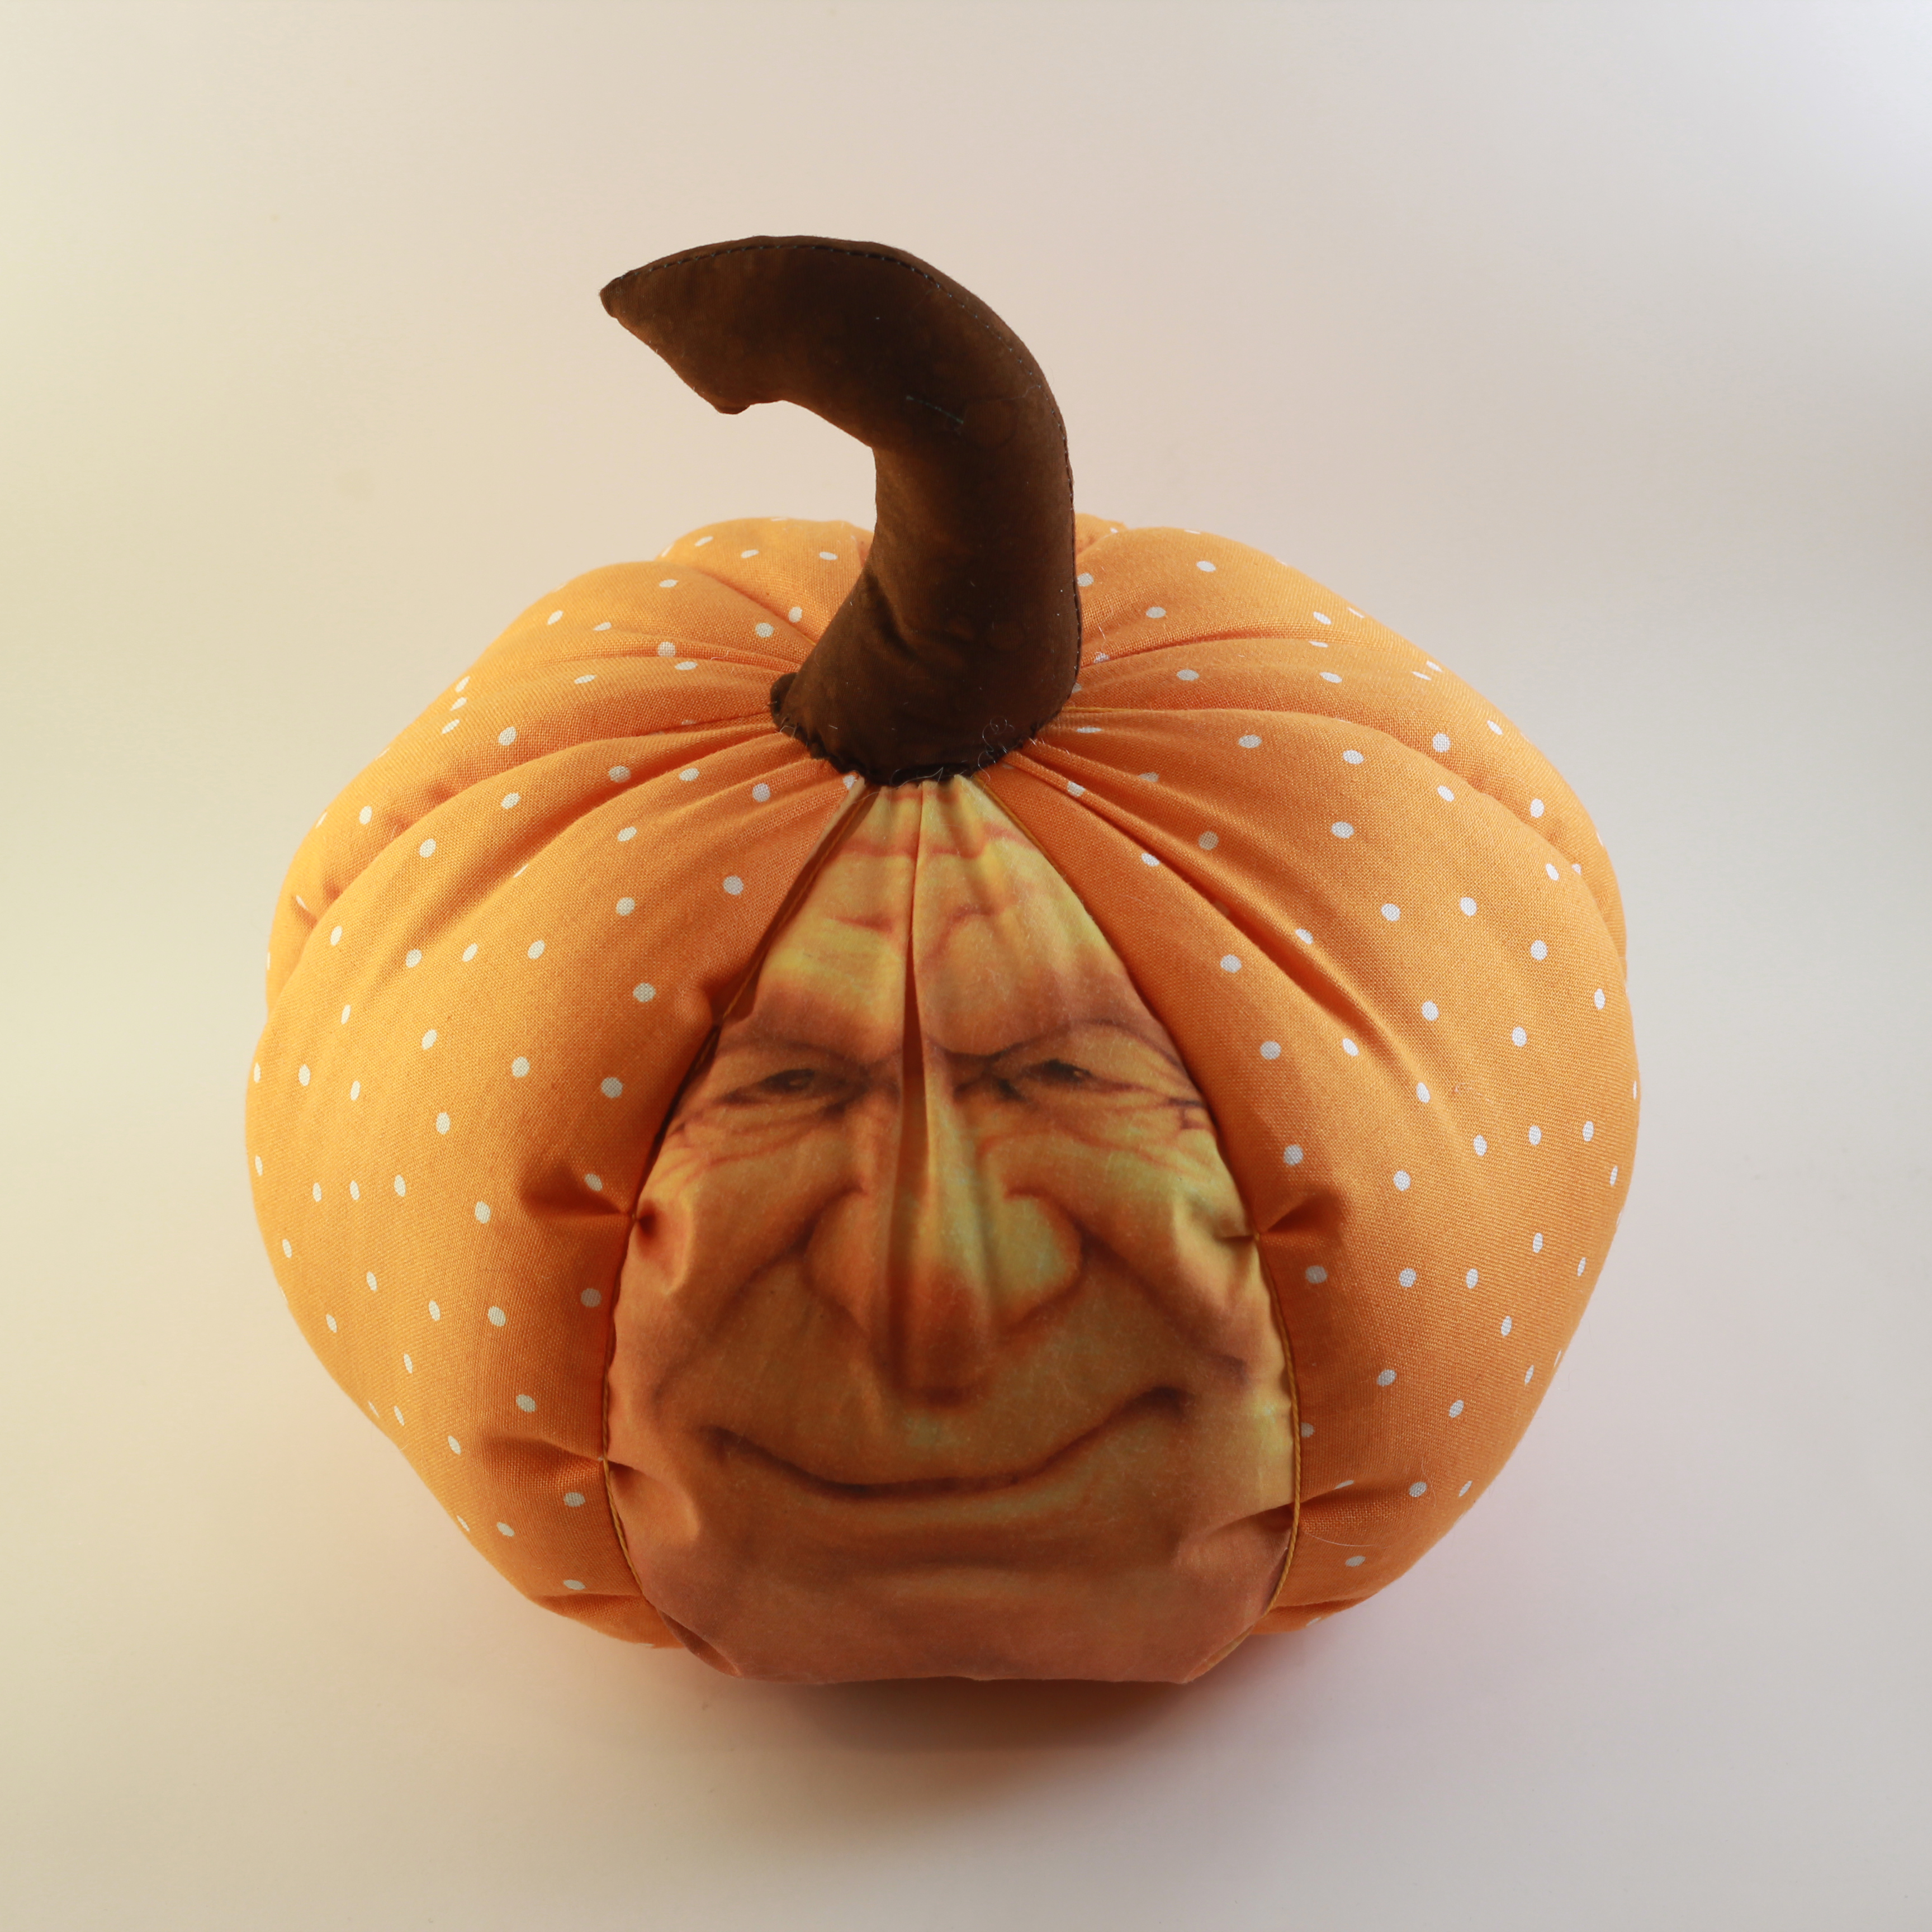
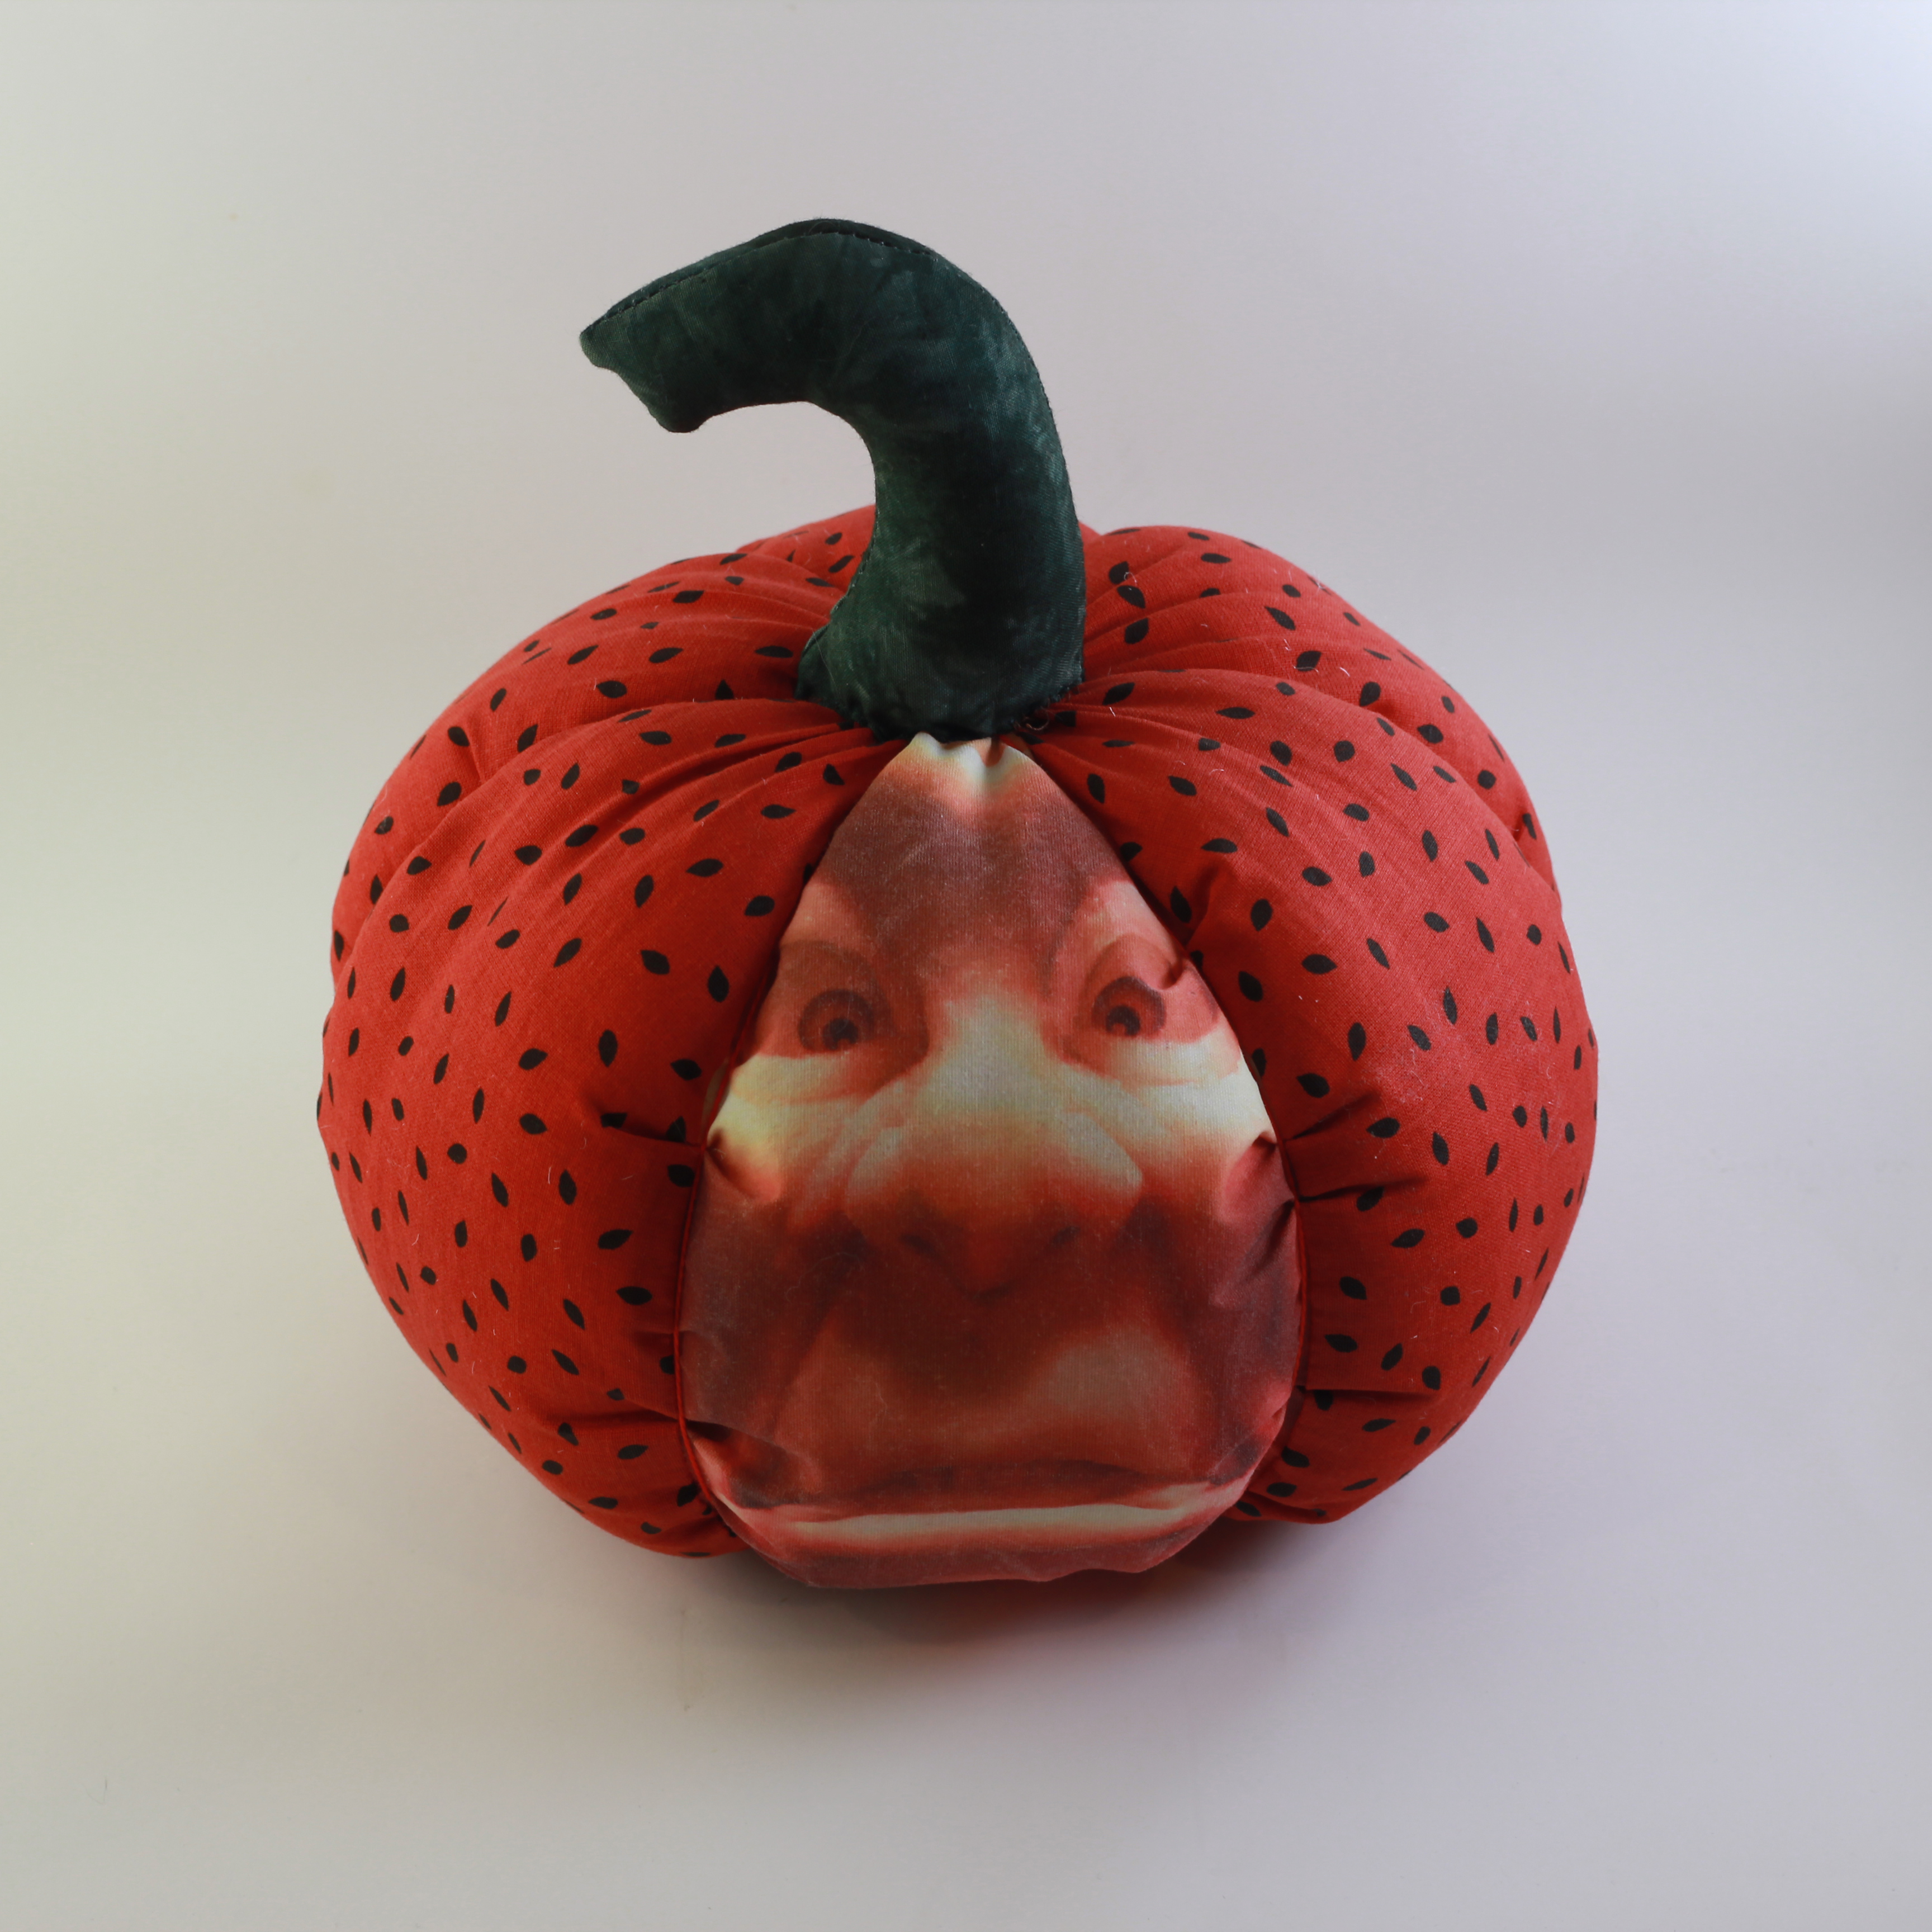
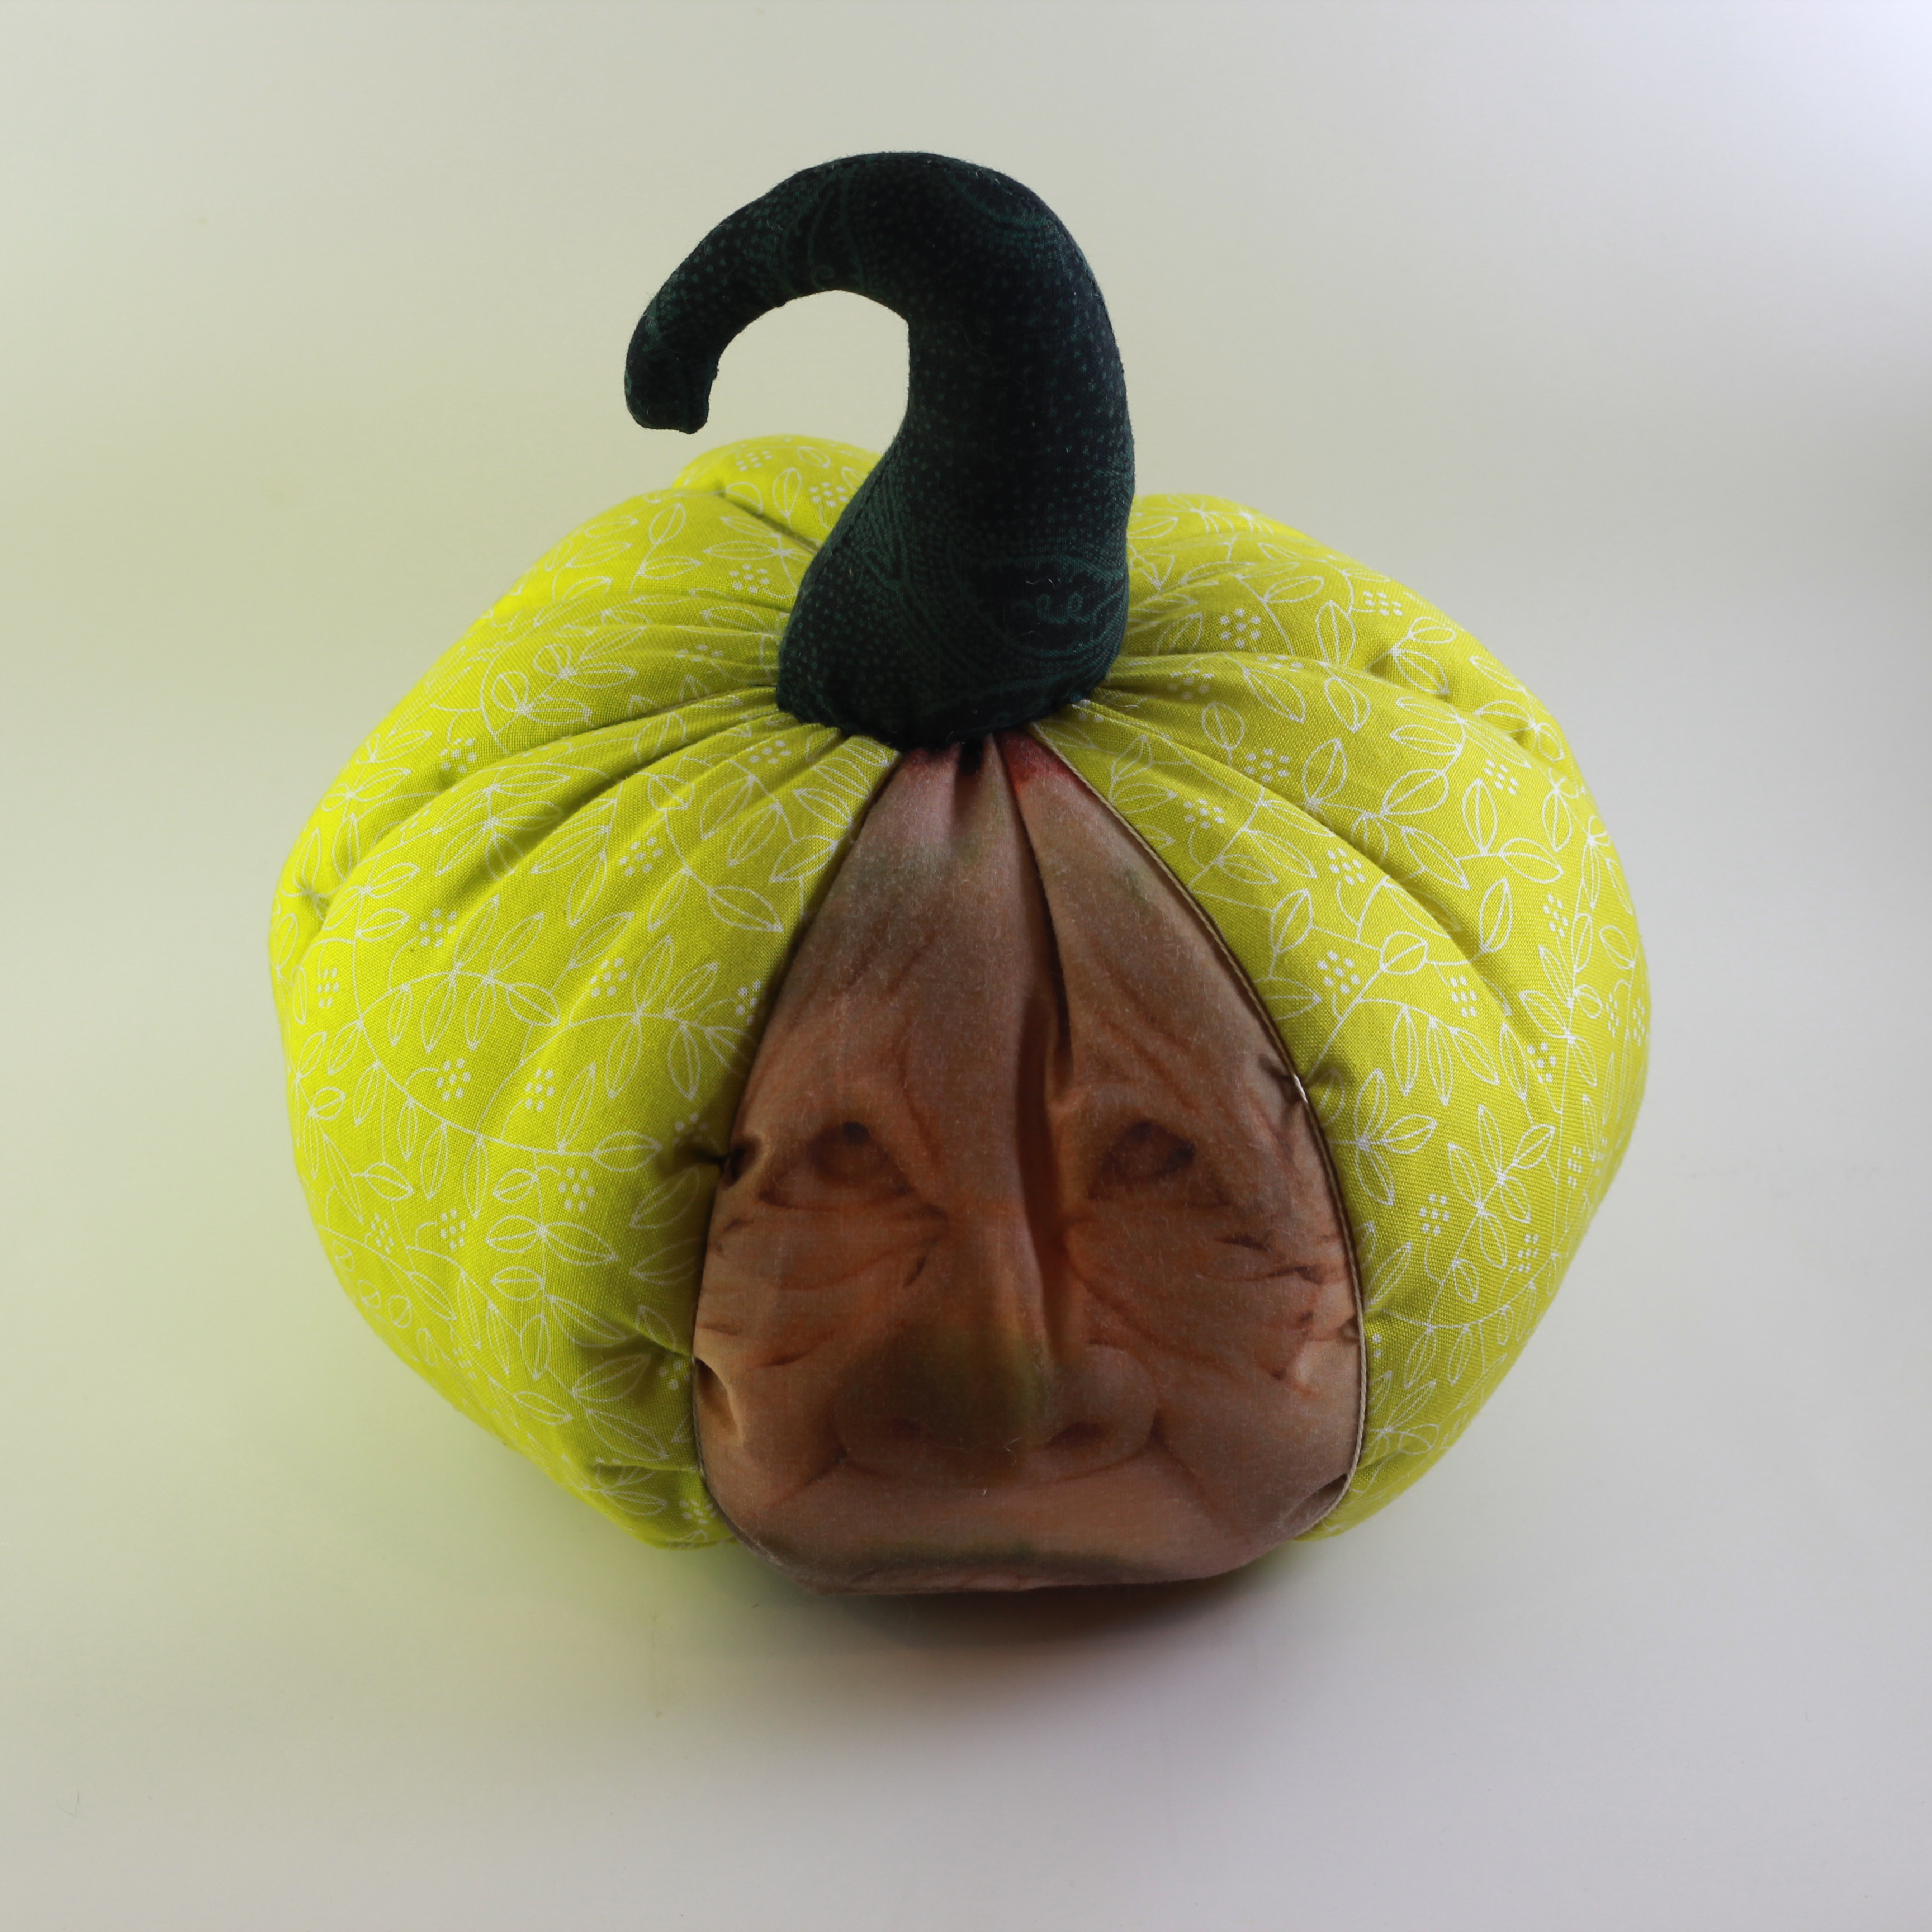
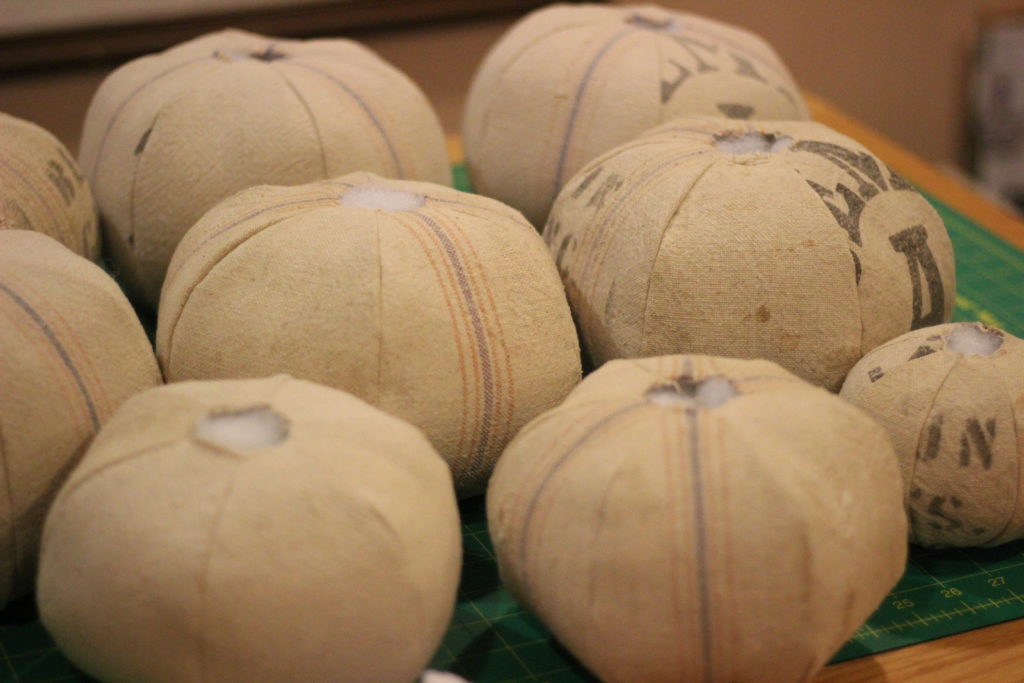
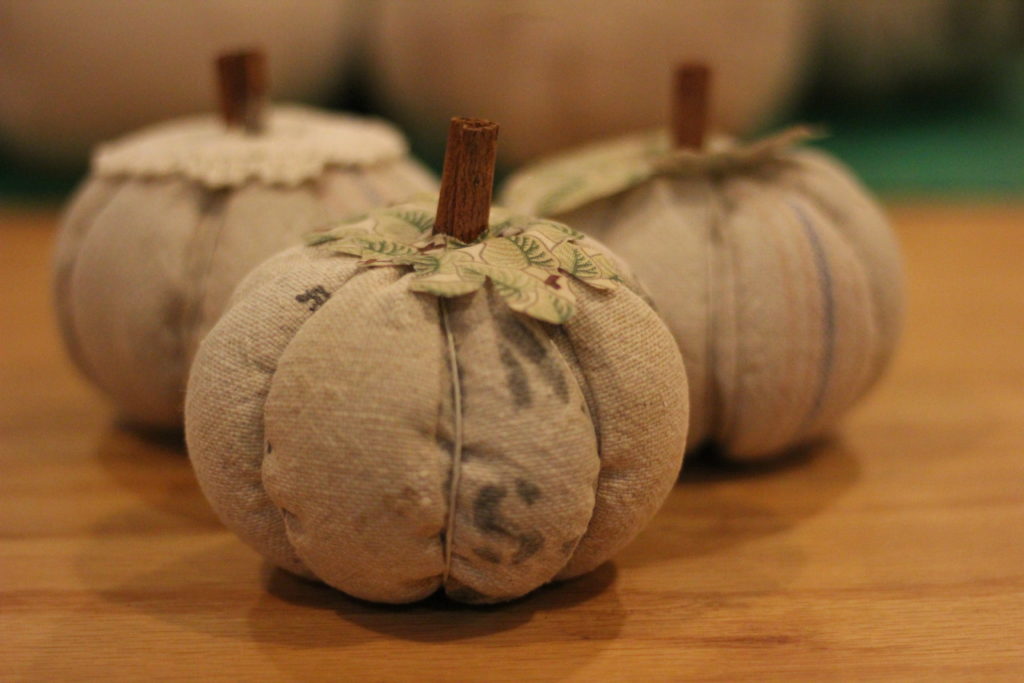
A few years ago, my husband started carving pumpkins professionally. I, in turn, started making plush ones to sell at his events. I started with a basic design with fabric stems. The satin one in the picture here has a cinnamon stick.
I moved on to pumpkins with representations of my husband’s faces. We made transfers of each of the best faces and turned them into permanent keepsakes. Many people attending the event would want to know if the carvings could be saved. This is one of the best ways!
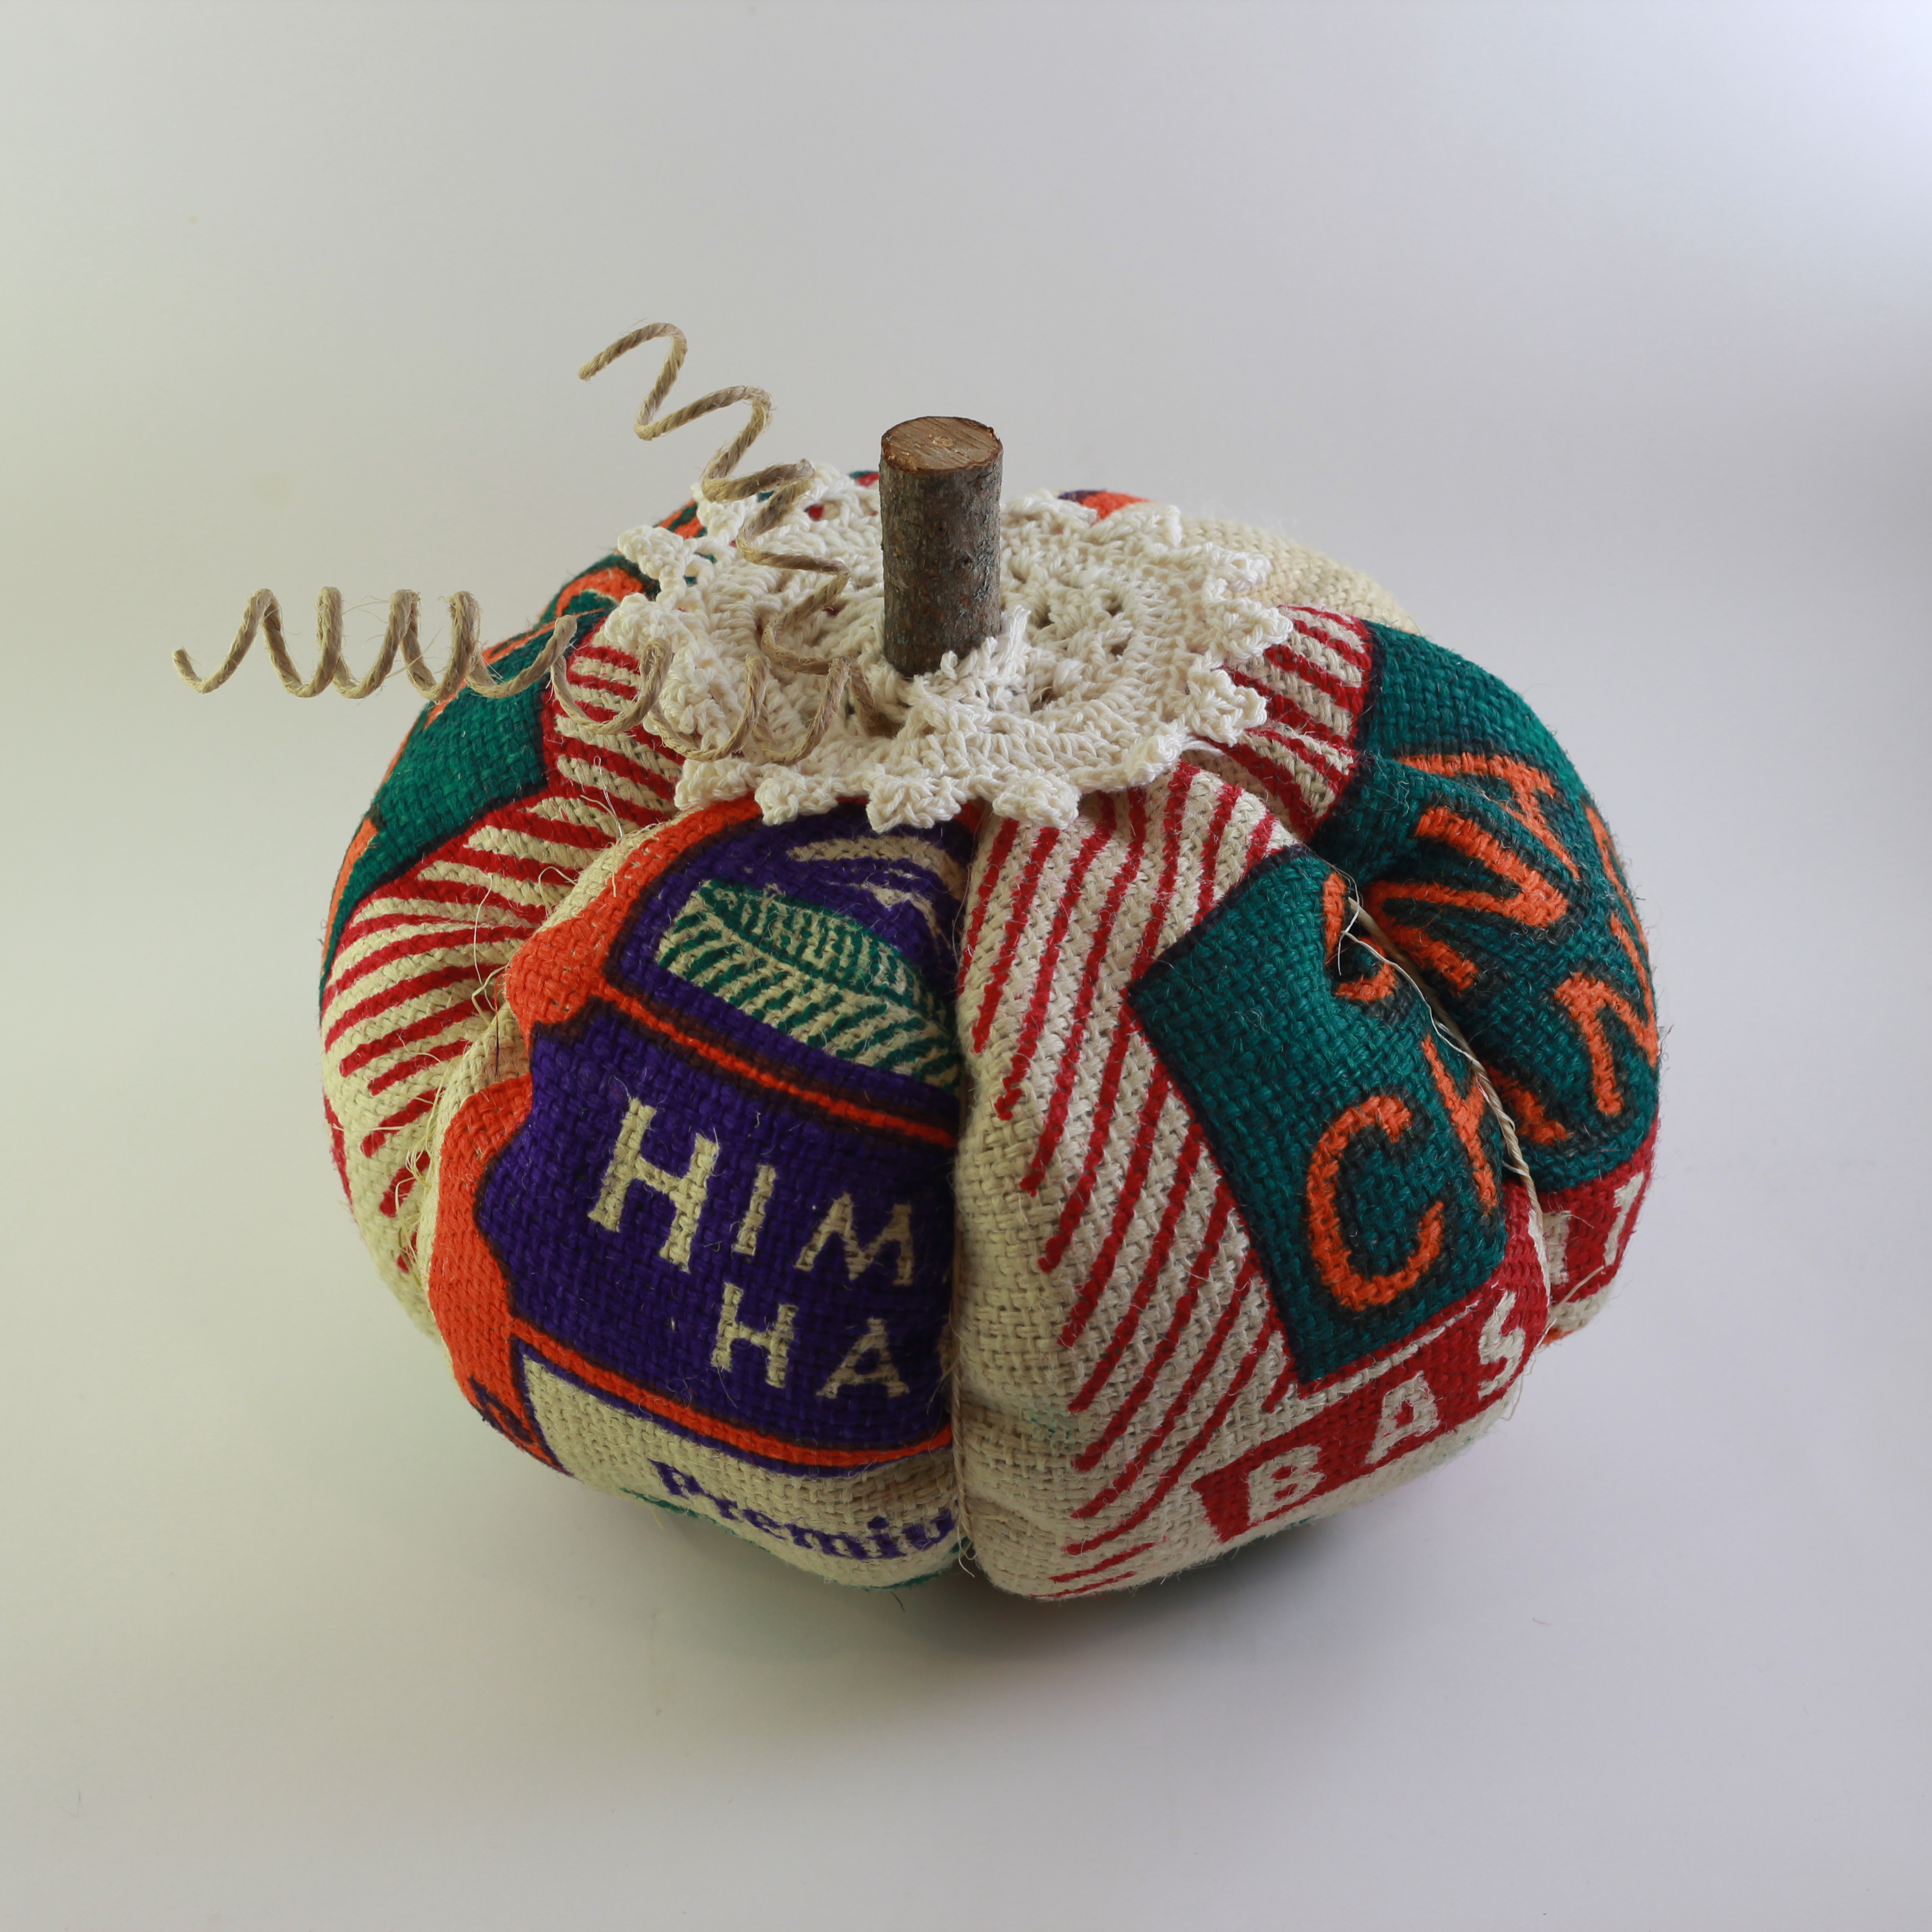
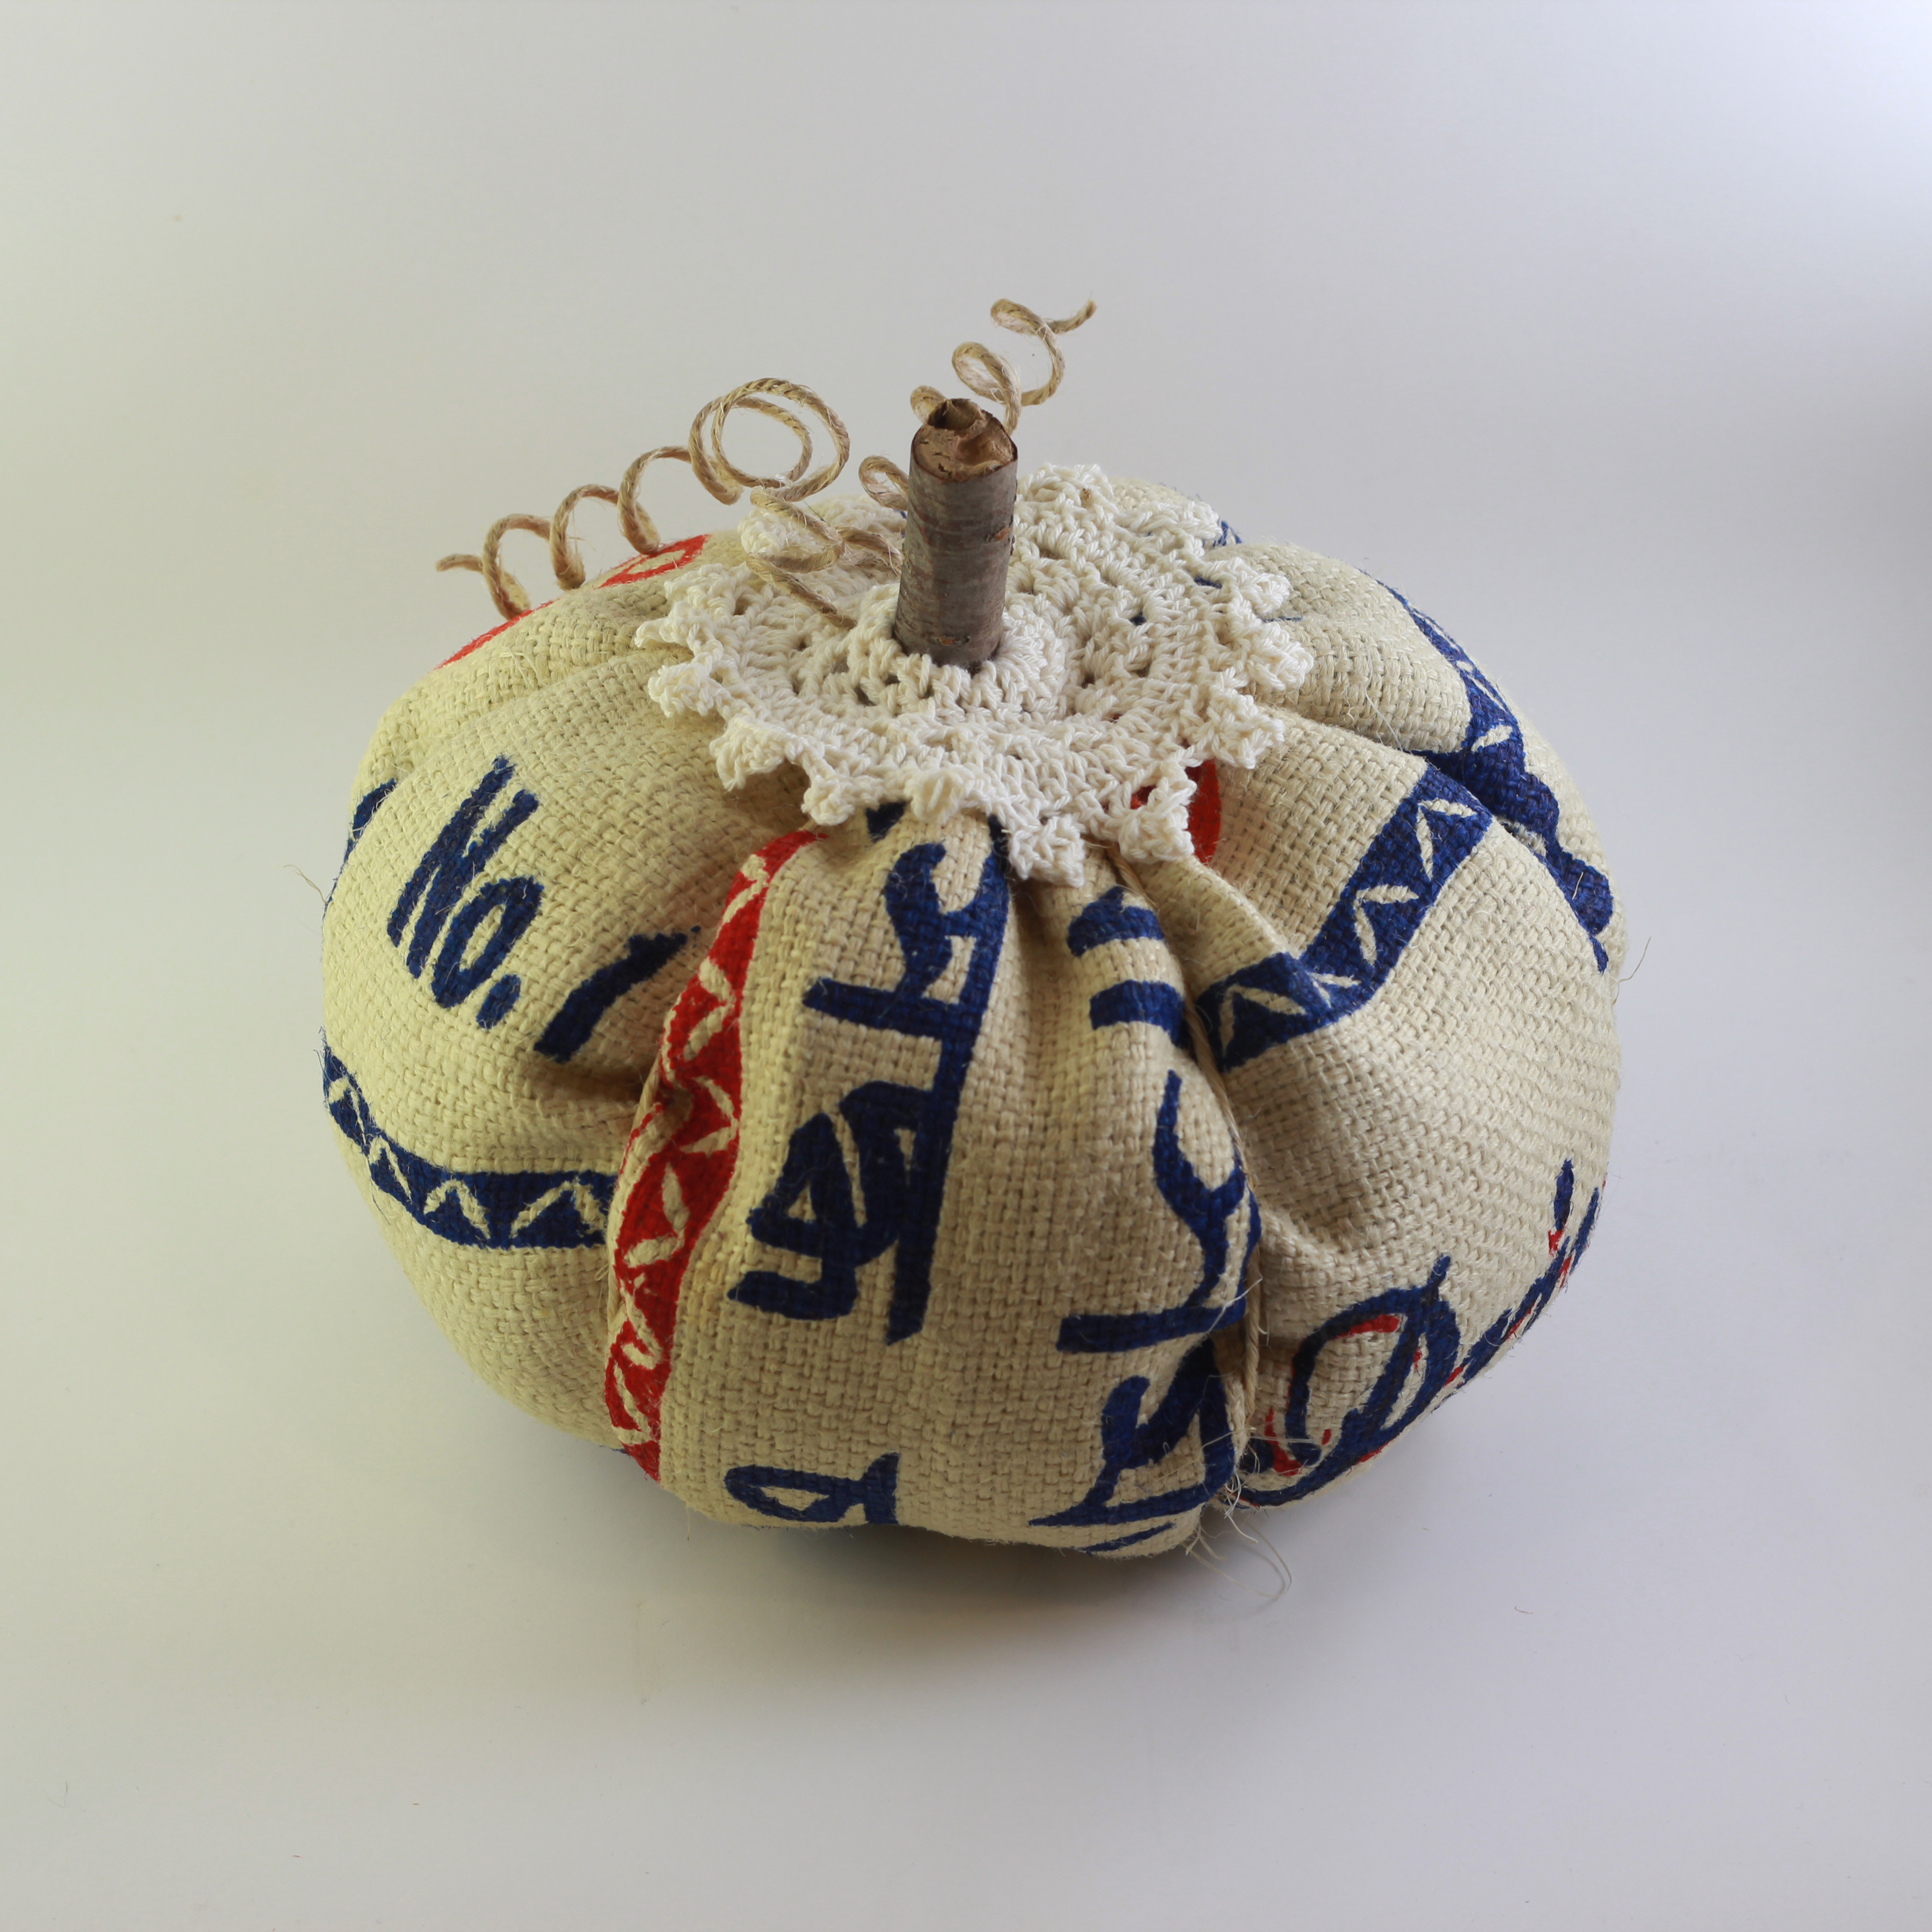
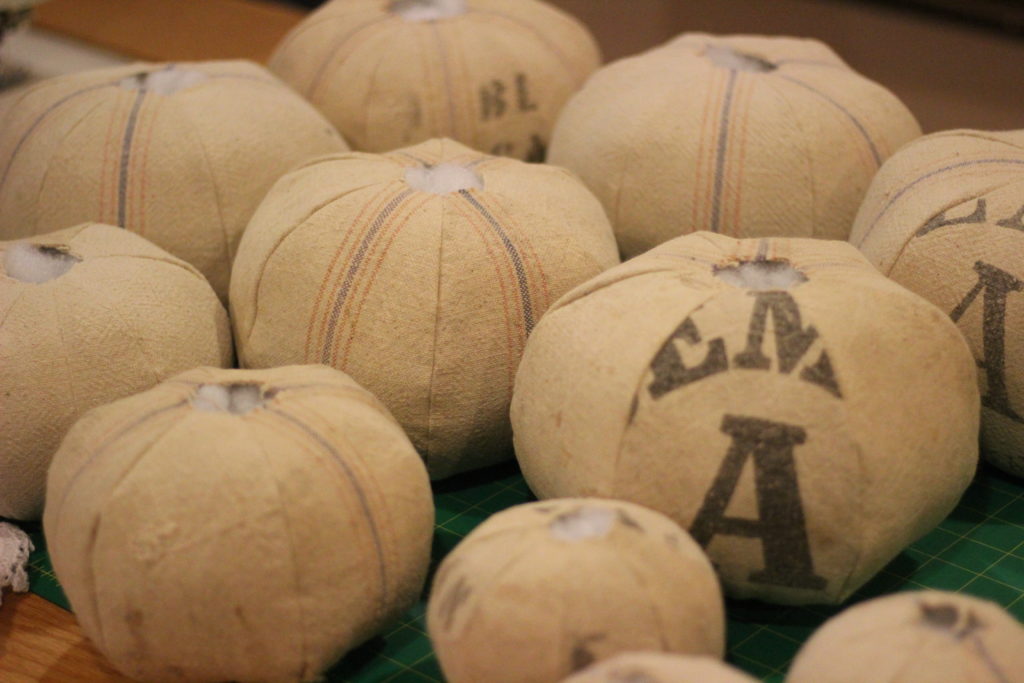
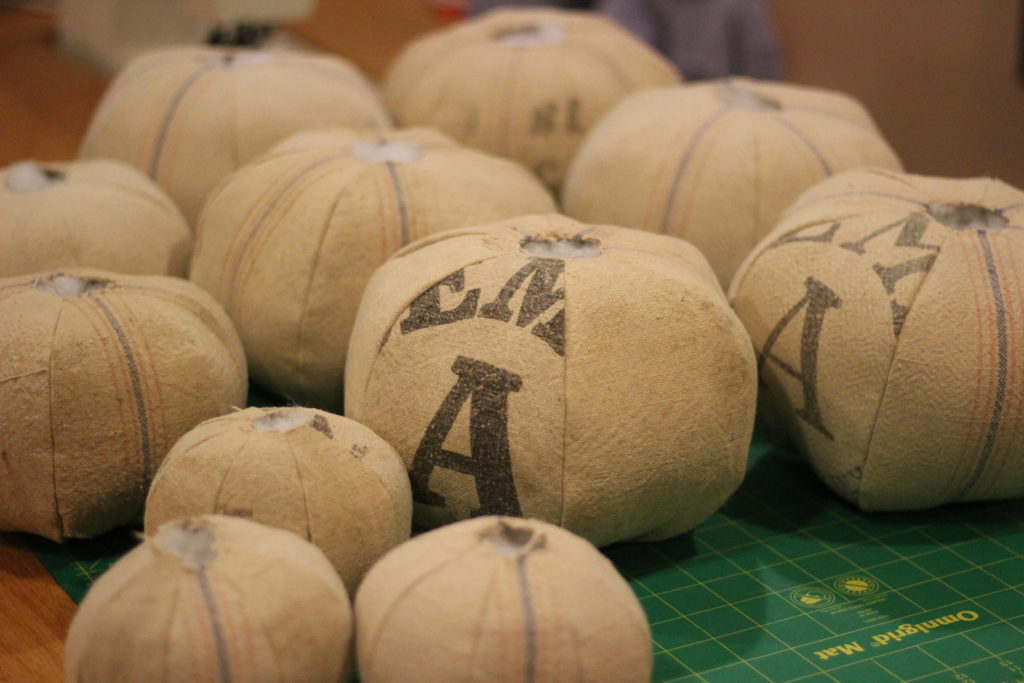
I also had a bunch of burlap basmati rice bags I had been saving. I had no clue what I was going to do with them, and they languished in my basement for years. With country chic being such a popular decorating style, it was clear that pumpkins were the way to go with them.
Having run out of rice bags, I bought several linen feed sacks at an antique mall. So new this season…French Country Linen Plush Pumpkins!
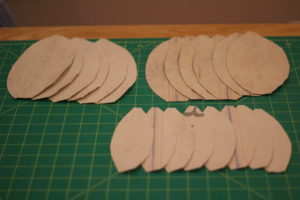
All pumpkins have either 6 or 8 panels. With the feed sacks, I aligned the stripes with the centers of the panels.
There are 3 sizes: small 8 panel, medium 6 panel, and large 6 panel.
More to come along with white damask linen in several sizes. All will be available on PumpkinStuff.com.
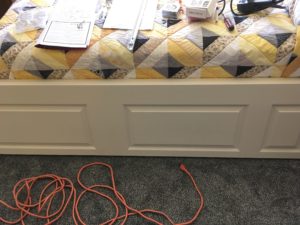
It’s been two years since I “finished” the guest room. But now it’s really done. We had a very good September which enabled me to finally get the closet doors. I’d already decided which style I wanted since I’d had two years to plan it.
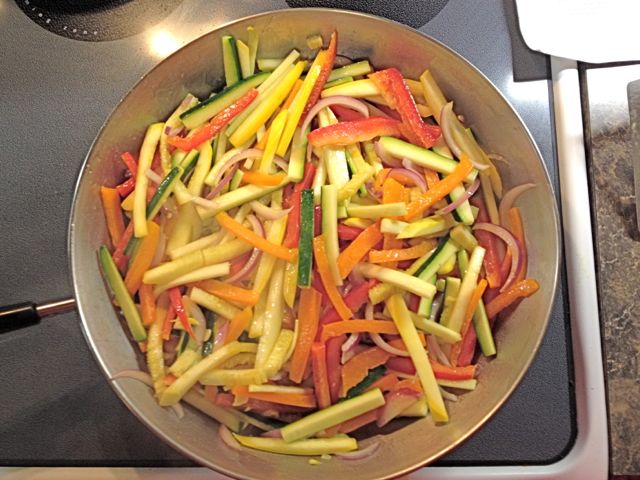
We went on a low carb diet in our home last year. It made a world of difference in the way we both feel and, in the case of D—, look. One of our repeat recipes is this tilapia. It takes longer to prep than it does to cook, and it really tastes fabulous.
If you have trouble finding xanthan gum, look in the baking aisle near the specialty flours. For the amount you will use in this recipe, it may seem expensive, but believe me, you will find a lot of other recipes to toss it in. Your gravies and sauces with never be the same.
I didn’t finish the guest room yet. I still have to put the closet door on. I promise that’s at the top of my list for 2016. And my lovely dining room – which was done before the start of the blog – has a wall-to-wall that has GOT TO GO! So I feel the need to tackle those UFOs (unfinished objects) soon. Those are the first two. The rest of them aren’t really unfinished, because they haven’t been started. But they have been started inside my head. And that’s almost as bad. Continue reading…
Here we are at the end of another UFO (unfinished object). I love the feeling, because it has me looking around for the next new thing. It’s more fun to start a new project than to finish something that’s been hanging around for a year. Ah, the possibilities.
On the other hand, there is something satisfying about sitting back and breathing a sigh of relief that I accomplished something all the way to the end.
Here are the plans I drew up to finish the glass tile table.
The beginning of this story is that I was able to get a plethora (that’s a fun word, say it again) of glass tile samples from a friend. I spent months soaking them off the carrier cards and cleaning of the excess paper. When we last left off, it was the middle of winter, and I had arranged them on some graph paper.
I couldn’t leave them there indefinitely. I had moved my design board out to the back porch when it was too cold to spend any time out there, but the weather was warming up, and I was forced into action. This meant building the table top and sticking all those tiles down.