Author Archives: Deborah

Yogurt-Marinated Grilled Chicken

I have my friend Jennifer T. to thank for this. She was getting rid of a bunch of food magazines (porn as far as I’m concerned), and I was happy to have them. I can’t tell you which magazine this came from though. Nothing left on the bottom of the clipping to tell me. So let’s just say it could’ve been Gourmet, Food Network, Taste of Home, or Rachael Ray. Continue reading…

Zucchini Fries

I am not a huge fan of zucchini. Generally, when faced with a harvest of varying sizes of the things, I turn them into something else entirely, like zucchini bread. But my husband loves squash in any form, so I tried to find something that would make us both happy. This came from allrecipes.com. I liked the flavors and the low carb idea here.Chicken Header

My two biggest hints are: 1) drain, drain, drain the zucchini. I drained mine for about 2 hours and hit it with the kosher salt twice. 2) rinse the dickens out of it before you coat them. All that salt will ruin the flavor if you don’t get most of it off. Continue reading…

Yellow & Gray Quilt – part 2

One week later…I have all my fabrics cut. It’s likely I will discover I have either too many or too few of some. IMG_5161There were templates to use for the pattern pieces, but I’m not a fan of templates unless I have no alternative. So I measured them and laid them out on the back of my gridded rulers.IMG_5648

The trapezoids were a little trickier. I cut strips of yellows and whites at 2 3/4″ and then cut the trapezoids from that. This ruler is a 12 1/2″ square. Very versatile.IMG_5649

After I had cut all the blacks, I realized that while the pattern in the book was square, the pattern I designed was on point. Hmmm. Continue reading…

The Upstairs Hall

This is what I call a small weekend project. The whole look of the hallway is changed just by painting the woodwork. These pictures show the hallway before. It’s your typical 1970s pre-fab hollow core doors in a disgusting shade of walnut brown. Nothing like it to make the area feel like a cave.

IMG_4955IMG_4954

The only door I actually removed was the linen closet bi-fold. Much easier to paint the edges and this was one where the back might show. Continue reading…

Armchair Slipcover

We have this serviceable but old chair that sits on the sun porch. The sunporch was totally redecorated by my husband, 22 year old step-daughter, and me over Memorial Day week 2012. The roof was recently replaced, so there was only one thing left to do. Recover the chair. I had purchased a slipcover for the pillow back sofa. That was too big a project for me to tackle when I could buy a cover for under $100. The chair, however, is not a normal shape. At least, not as far as commercially made slipcovers are concerned.

IMG_4326IMG_4327IMG_4328

Since I had to buy cotton duck to cover 2 of the pillows for the sofa, I bought an extra 4 yards. It turned out to be exactly enough. I also planned exactly where I would have to put velcro strips to hold the whole thing on. I am not a fan of those adorable little bow ties, and I wanted this to look as tailored as possible.

I did a bucketload of searches online to find instructions for making my own slipcover. The best one I found suggested laying the fabric over each section of the chair and tracing a pencil line along the cording. I pinned the fabric to the chair so it wouldn’t slip, traced the cording and then cut the fabric about an inch bigger than that to have enough for a half inch seam allowance and hopefully a little extra in case the fabric shrank later.

IMG_4330 IMG_4331

I should, perhaps, take this moment to tell you that I had pre-washed the fabric and dried it in a hot dryer in order to minimize future shrinkage.

I started with the front and the back, not tapering the sides too much so it would be easy to actually slip the cover over the top of the chair. I stopped the seams right above the arms, which I wanted to leave exposed. Continue reading…

Yellow & Gray Quilt – part 1

My husband and I have lived in our home about 7 years now. In that time, we have remodeled the kitchen/family room, living room, dining room, sunporch, and basement. The only room untouched on the first floor is the half bath. But we’ll get to that later.

The only room on the second floor that has been done is my step-daughter’s room. We wanted to make sure she was comfortable first as she wouldn’t be living with us that much longer. She was a junior in high school at the time and would be leaving for college soon.

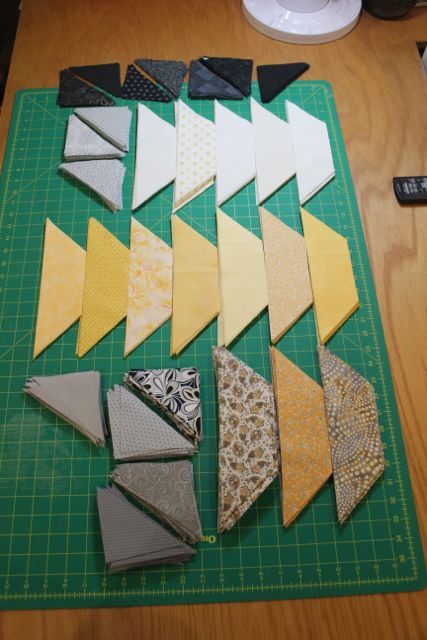
This is all a very long way of saying that I am finally getting to the guest room. My husband took the lovely wood duck wallpaper border off years ago, but that’s as far as we got. I’ve decided to do the whole room in yellows, grays, and whites. Me being me, I am starting with the quilt. It will take the longest time.

My usual modus operandi (can you tell I’m an avid mystery reader?) for designing a quilt is to pick the fabrics first.
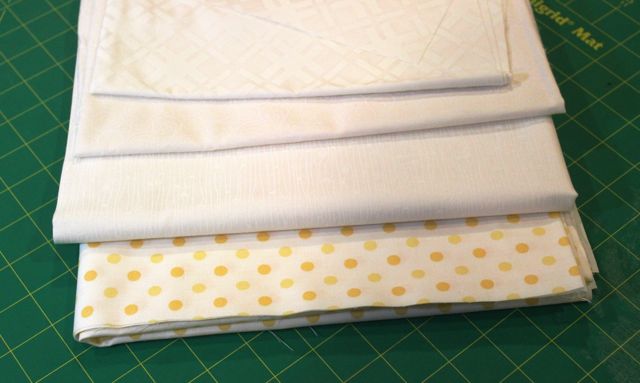
IMG_4934

Whites

I will likely not use all the fabrics I’m showing here, but you never know. Because I also like the scrappy look of lots of different fabrics.
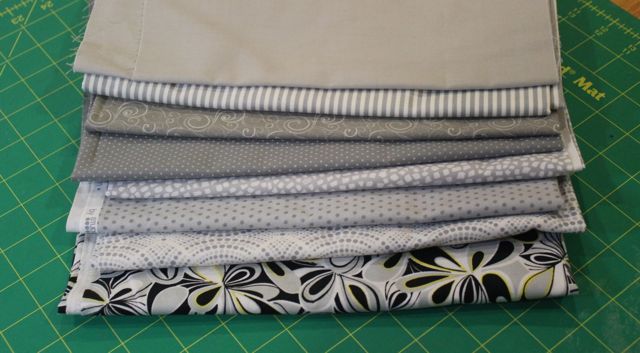
Grays

Grays

The one on the bottom of the gray group has bits of yellow in it too. It’s sort of hard to see in this picture. Hopefully, the wild pattern won’t be too distracting and will simply hold the colors together.
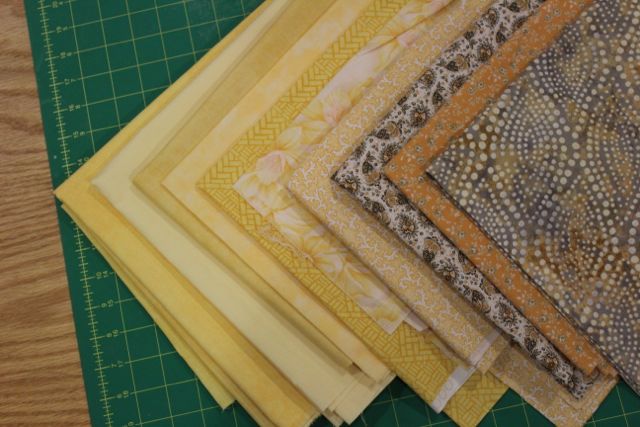
Yellows

Yellows

The fabric on the top of the yellow group is leftovers from  the backing on Lightship (see Quilt Sampler). The walls in the room will be painted yellow, so the overall look of the quilt will dictate which paint I end up with.

Blacks

Blacks

Blacks are included to give it a little punch and definition. I went through lots of books and catalogs to get my inspiration for the design. I settled on a fairly basic pattern that I liked online before going through my books. The pattern I chose is from Kaffe Fassett’s Glorious Patchwork. The book was a gift from my cousin Sascha almost 10 years ago when I was diagnosed with ovarian cancer. But that’s another story.

Fassett’s designs aren’t all that complicated, but his colors choices are something else!

My design on the left. Kaffe Fassett's on the right.

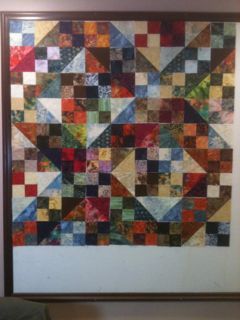
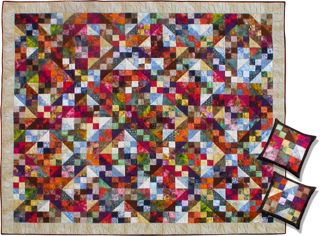
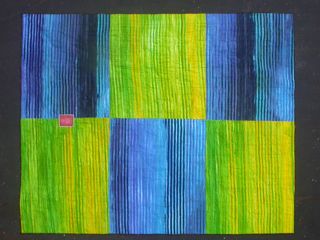
My design on the left. Kaffe Fassett’s on the right.

If you look carefully at these, you can see that they are almost the same thing. The only change I will be making to mine is to split each patch to match the shading of the one from the book. This is why I needed a black.  The squares that are gray on my design will be the pyramid shape in the middle.

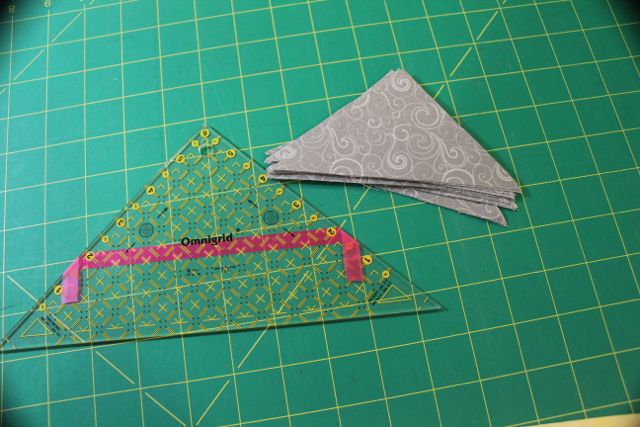
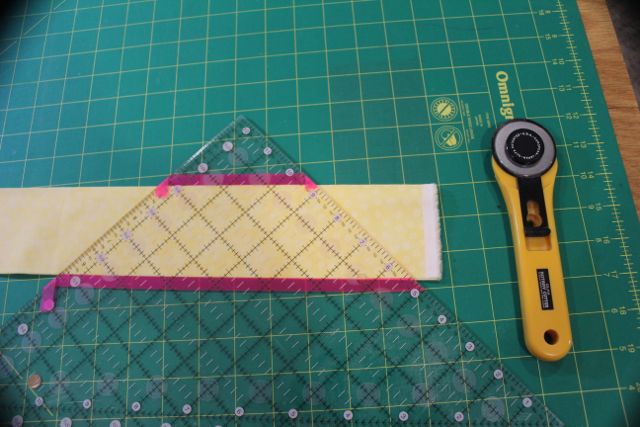
Next step is to calculate how many of each color I need to cut and go at it. There are templates in the back of the book, so I won’t have to draw that part.

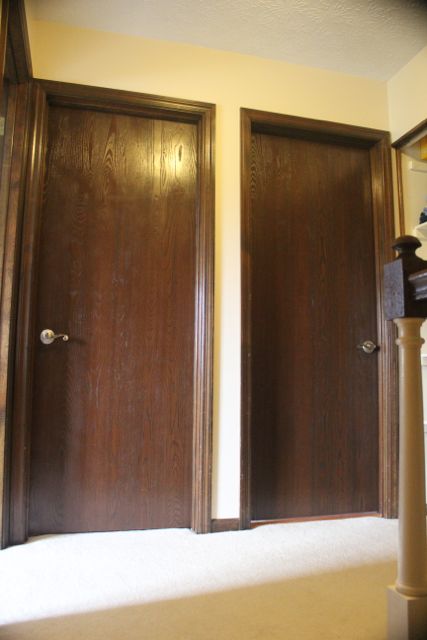
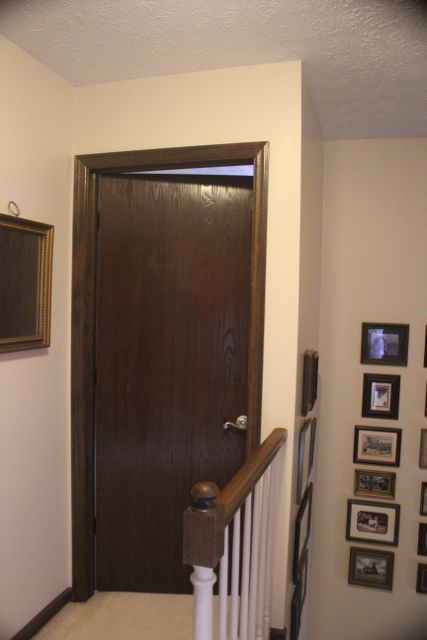
But for today, I am painting the “woodwork” in my upstairs hall. I use the term woodwork loosely, because it’s all that hollow core stuff. Practically pressed paper. Anyway, it’s all a hideous shade of dark walnut now. And I’m just not happy unless I’m doing 4 things at once. So look for the cut pieces of quilt in about a week!


Gallery #1

Just a smattering of my photos. Most are within the past year. Although Virgil is from my second visit to Kaua’i in 2003.

I was snorkeling and the current blew me toward this huge (everything is huge underwater) sea turtle. I didn’t hit it, but I came awfully close! This was taken with a cheap underwater instamatic film camera.

Virgil

Virgil

I love taking pictures of things really close up. I don’t have a zoom lens (yet!), but I’m really happy with these three.

Glass Ornaments at the North Market Holiday Craft Show - 2012

Glass Ornaments at the North Market Holiday Craft Show – 2012

Ketchup Bottles

Newport, RI – 2012

Coca-Cola Mugs - Ohio State Fair 2013

Coca-Cola Mugs – Ohio State Fair 2013

Here are two more from the Ohio State Fair. Good thing there was a cage between me and the rooster. They get belligerent.

Type Case - 2013

Type Case – 2013

Glowering Rooster - 2013

Glowering Rooster – 2013

The Long Run

Batiks are my favorite fabrics. I love to see them paired with a super traditional pattern. I’ve been sewing since I was 10 years old and quilting since I was about 31. One of the first books on quilting that I bought focused on the Jacob’s Ladder pattern. I didn’t really like the book all that well. It’s hard to get excited from a bunch of black and white drawings. But I liked all the different ways the standard Jacob’s Ladder block could be arranged.

Two years ago, my sister Bekkie married her long-time boyfriend Joe. At that point I thought, here is the perfect time to make that pattern I’ve been wanting to make for the last 20+ years.

IMG_0304

Sections Ready to be Sewn into Squares

I sorted my batiks into lights and darks. In one case, I had a fabric I used as both. I was planning a queen size quilt, so I drew up my pattern on graph paper and figured out how many of each section I needed to make. I cut strips for the 4 square sections and triangles for the half square sections. Weeks of sewing ensued. (Since I have a full time job and a soap business on the side, it takes me a while to do something this large.)

IMG_0311

Sorting into Squares

IMG_0310

The Design Wall & Table

IMG_0309

The Design Wall

My goal with each color choice was not to duplicate the same fabric in any single square.About a week was spent on the layout. I ran out of room on my design wall, so I worked on the table as well, eventually sewing sections together as I went so didn’t lose track of what went where.

In some places the edges seemed to blur, and in others, it was very defined. Just what I was hoping for. But, as I usually end up doing, I had too many final squares in the end. It’s like those things that mysteriously multiply in your closet. You can’t figure where they came from, but you look at it as a bonus! So I made 2 matching 16″ pillows (12″ squares with 2″ borders added.)

It was done in time for a first anniversary/Christmas present.

DSCN3468 2

Front and 16″ pillows

Back

Back


Lemony Potato Salad

These days my husband and I are trying to watch what we eat. Some of us more than others. By which I mean that I am really bad about staying away from stuff I like. Like massive quantities of cheese and mayonnaise. But, in the interest of keeping the both of us around on Earth longer, I went looking for a potato salad recipe that didn’t have any mayo in it. And TA DA! I found this on MyRecipes.com

Ordinarily, I leave recipes alone until I’ve made them once. However, this one looked like it needed a little extra crunch. So I added red bell pepper and radish slices. And some fresh dill I have running rampant in my garden. Maybe next time I’ll add a bit of celery too. Potato Salad

Yield: Makes 6 servings, Total: 50 Minutes

Ingredients

2 pounds red potatoes, cut into eighths
1/4 cup olive oil
3 tablespoons lemon juice
3/4 teaspoon salt
1/2 teaspoon dry mustard
1/4 teaspoon freshly ground pepper
3 green onions, thinly sliced
2 tablespoons chopped fresh parsley

Preparation

1. Bring potatoes and salted cold water to cover to a boil in a large Dutch oven; boil 15 to 17 minutes or just until tender. Drain and let cool 5 minutes.

2. Whisk together olive oil and next 4 ingredients in a large bowl. Add warm potatoes, green onions, and parsley; toss to coat. Serve at room temperature or chilled.

Nutritional Information

Amount per serving

Calories: 196 Fat: 9.7g Saturated fat: 1.4g Monounsaturated fat: 7.2g Polyunsaturated fat: 0.9g Protein: 3.1g Carbohydrate: 25.4g Fiber: 2.9g Cholesterol: 0.0mg Iron: 1.3mg Sodium: 302mg Calcium: 24mg